
Why a Brick Paver Walkway Is One of the Best Investments for Your Home
A brick paver walkway is one of the most durable, attractive, and value-adding hardscape features you can add to a Massachusetts property. Whether you’re connecting a driveway to a front door or creating a garden path, the right installation method makes all the difference between a walkway that lasts decades and one that shifts, sinks, or cracks within a few years.
Quick answer — how to install a brick paver walkway:
- Plan your layout, width (36–48 inches for main paths), and brick pattern
- Excavate 7–8 inches deep along the planned route
- Build the base with compacted gravel (4–6 inches) and leveling sand (1–1.5 inches)
- Lay the pavers in your chosen pattern with consistent 1/4-inch joints
- Install edge restraints to prevent shifting over time
- Fill joints with polymeric sand and compact the finished surface
Professional installation in Massachusetts typically costs between $10 and $25 per square foot, based on publicly available industry averages — though project-specific factors like materials, site conditions, and complexity can push costs significantly higher or lower.
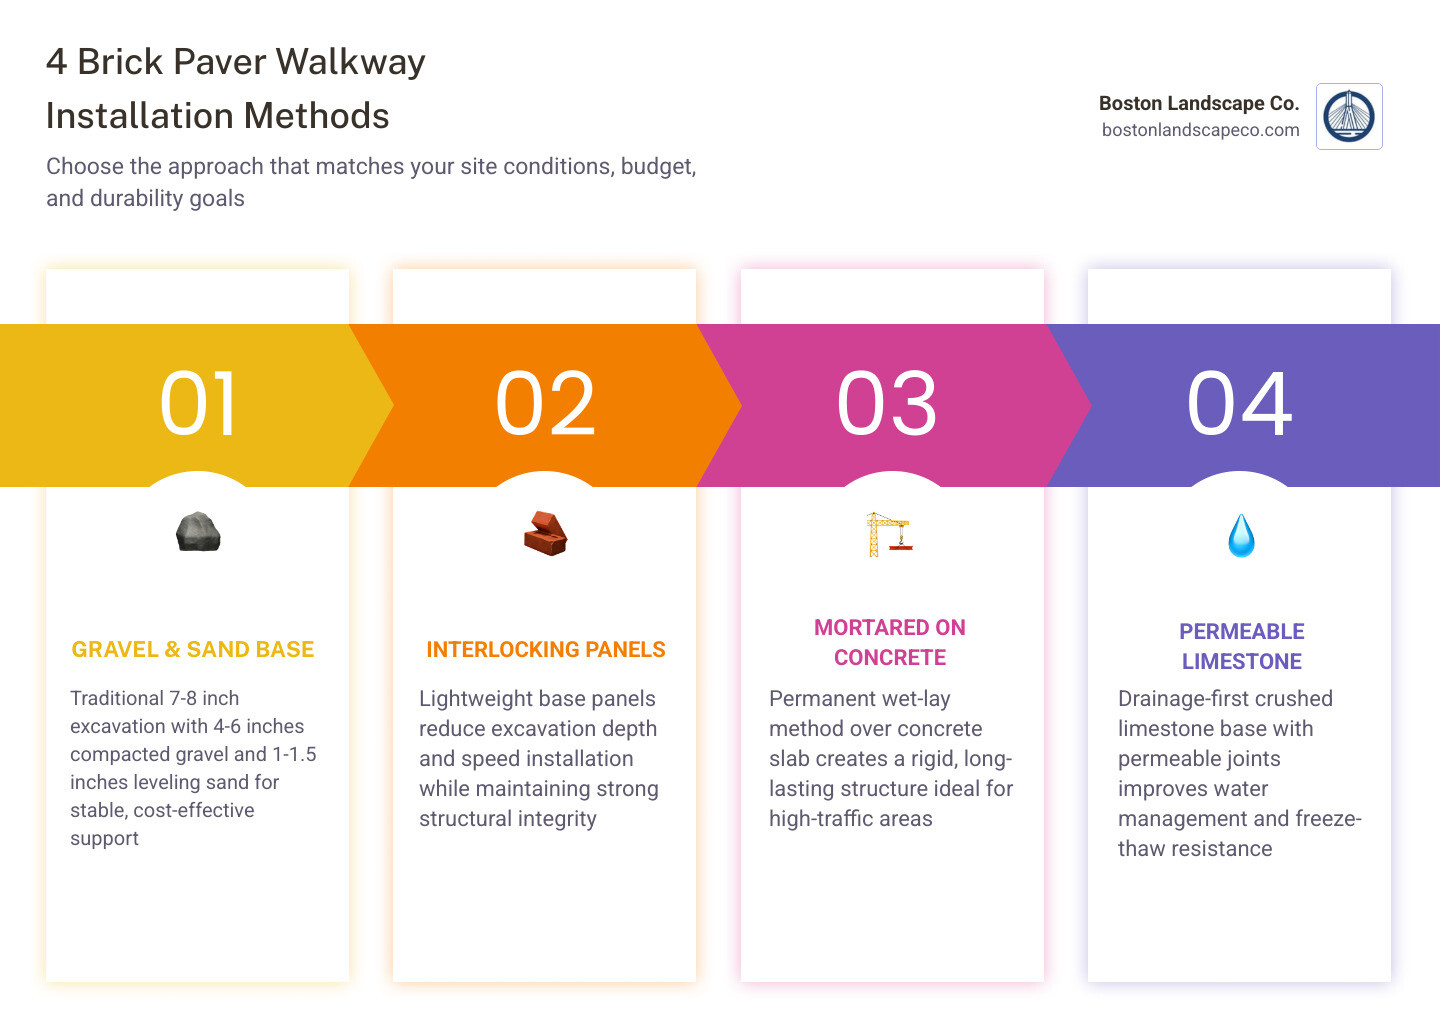
There are four distinct installation methods — traditional gravel-and-sand base, interlocking base panels, mortared brick on concrete, and permeable crushed limestone base — and each suits different site conditions, budgets, and performance goals. This guide covers all four.
I’m Steve Schumacher, owner-operator of Boston Landscape Co. since 1991, and over more than three decades I’ve planned and installed countless brick paver walkway projects across the Greater Boston area, from residential front yards to commercial property entrances. That hands-on experience with Massachusetts soils, freeze-thaw cycles, and local site conditions is exactly what I’ll draw on throughout this guide.
Key brick paver walkway vocabulary:
Planning Your Brick Paver Walkway: Dimensions, Patterns, and Costs
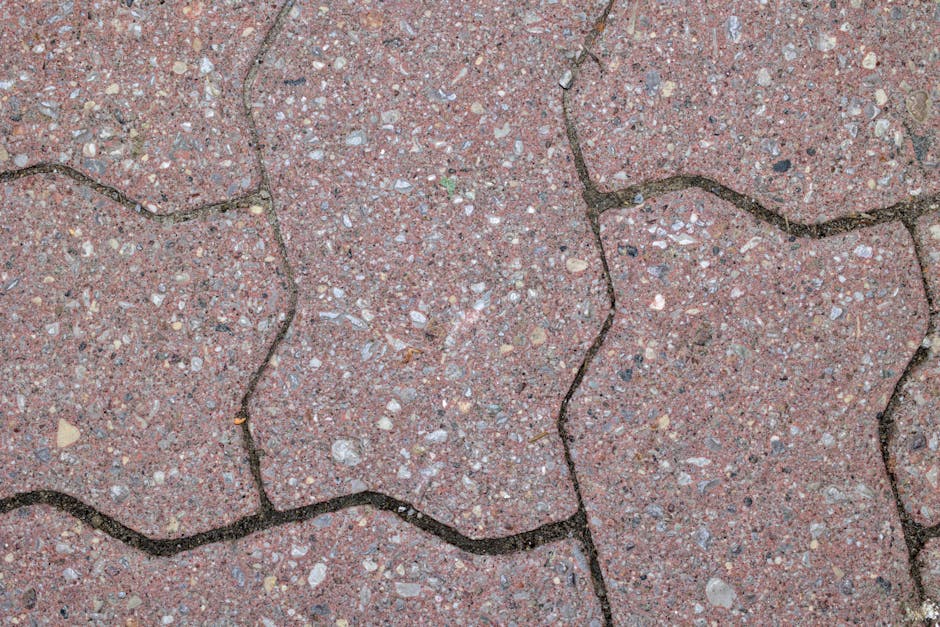
Before picking up a shovel, we must carefully plan the layout, choose the aesthetic patterns, and outline the budget. Proper planning prevents structural failures and ensures your new pathway beautifully complements your home’s architecture.
When analyzing your budget, it is helpful to look at how brick compares to other common materials. The table below outlines how standard options compare in terms of initial investment and longevity:
| Walkway Material | Average Installation Cost Range (Internet Data)* | Expected Lifespan | Maintenance Requirements |
|---|---|---|---|
| Brick Pavers | $5,000 – $15,000+ | 50+ Years | Low (occasional sand sweep & sealing) |
| Poured Concrete | $3,000 – $9,000 | 15–25 Years | Medium (prone to cracking in cold climates) |
| Natural Stone | $7,000 – $20,000+ | 75+ Years | Low to Medium (joint weeding required) |
| Gravel / Mulch | $1,000 – $3,000 | 3–7 Years | High (frequent replenishment needed) |
*Note: All prices mentioned above are average costs sourced from publicly available internet data and are not the actual prices of Boston Landscape Co. These ranges are provided to demonstrate industry variability.
For more details on budgeting and material choices, read our guide on Brick Walkway Cost.
Designing a Brick Paver Walkway for Maximum Curb Appeal
The pattern you choose plays a significant role in both the visual appeal and the structural integrity of your path. Certain layouts handle foot traffic and curves better than others.
- Herringbone Pattern: Set at either 45 or 90 degrees, this classic interlocking pattern is exceptionally strong. It resists shifting under heavy foot traffic and wheelbarrows. It is a striking choice for straight paths and formal entryways.
- Running Bond: This is the easiest pattern to install because the bricks are laid end-to-end in staggered rows. It is highly forgiving, requires fewer cuts, and looks fantastic when framing Curved Walkway Ideas.
- Basketweave: A traditional pattern where pairs of bricks are laid perpendicular to one another. This creates a charming, historic look that works beautifully when designing a Walkway for Garden spaces.
A thoughtfully designed walkway does more than guide visitors; it frames your landscaping and highlights your home’s architectural details. For more design inspiration, check out How to Add Curb Appeal With Brick Paver Walkways – Decorative Driveways LLC.
Understanding the Real Cost of Professional Installation
While browsing online might lead you to believe a walkway is a simple weekend project, the physical demands of excavation and base preparation often prompt homeowners to seek professional assistance.
When looking at industry averages, a professional installation can vary widely. According to general online data, a standard paver walkway project averages around $2,480. However, to account for industry variability, complex site preparations, and premium materials, typical professional installations across the region generally range from $5,000 to $15,000+ for a standard project.
These costs reflect the intensive labor required to build a walkway that survives the harsh New England winter. If you are planning a complete backyard overhaul, we recommend reading our Hardscaping Your Yard Guide to see how your walkway fits into a broader landscape plan.
Local regulations also play a role in your installation. If you live in Burlington, MA, you should consult the Burlington municipal guidelines regarding hardscape setbacks and structural permits. Similarly, if you are looking into professional paver installation in Billerica, MA or planning premium patio work in Lexington, working with a licensed team ensures all local zoning codes and drainage regulations are fully met.
Essential Materials and Tools for a Long-Lasting Path
A professional-grade brick paver walkway requires specialized tools and high-quality materials. Skipping out on the right base materials is the number one cause of premature walkway failure.
Before starting, ensure you have the following materials on hand:
- Severe-Weather-Rated Brick Pavers: Ensure your bricks are rated for ground contact and freeze-thaw cycles.
- Crushed Gravel (3/4-inch minus or Class II): This serves as the sub-base, providing structural support and drainage.
- Coarse Concrete Sand: Used for the bedding layer directly beneath the pavers.
- Polymeric Sand: A specialized sand infused with polymers that activate with water to lock the joints and prevent weed growth.
- Heavy-Duty Landscape Fabric: Placed over the excavated soil to prevent the gravel base from sinking into the subgrade.
- Professional Edge Restraints: Plastic or aluminum edging secured with heavy-duty metal spikes.
For the tools, you will need a commercial plate compactor, a hand tamper, a wheelbarrow, shovels, mason’s string lines, a line level, PVC pipes (for sand screeding), and a circular saw or angle grinder equipped with a diamond blade for clean cuts. For more insights on selecting the right raw stones and tools, read How to Build Pathways: Brick and Stone Pathways (DIY) | Family Handyman.
How to Install a Brick Paver Walkway: 4 Professional Methods
There is no one-size-fits-all approach to laying pavers. Depending on your yard’s drainage, soil type, and budget, we utilize four distinct installation methods. To explore how these pathways fit into your broader yard layout, view our Backyard Path Ideas Complete Guide.
Method 1: Traditional Gravel and Sand Base
This is the gold standard for residential walkways. It relies on a layered, flexible base system that moves naturally with ground shifts without cracking.
- Excavation: Dig out the walkway path to a depth of 7 to 8 inches. Make sure the trench is roughly 6 inches wider than your planned walkway to accommodate the edge restraints.
- Soil Compaction: Run a plate compactor over the bare soil to create a firm, unyielding foundation.
- Gravel Sub-Base: Lay down heavy-duty landscape fabric, then add 4 to 6 inches of crushed gravel. Compact this base in 2-inch increments (or “lifts”), lightly misting with water to achieve maximum density.
- Sand Bedding: Lay down two parallel PVC pipes to act as depth guides. Pour 1 to 1.5 inches of coarse sand over the gravel, then run a straight board across the pipes to “screed” a perfectly flat sand bed.
- Laying Bricks: Start from a square corner and lay your bricks in your chosen pattern. Click here for a deeper dive into this classic technique: How to Lay a Brick Paver Walkway – This Old House.
- Edging & Joint Sand: Install edge restraints along the perimeter, sweep polymeric sand into the joints, run the plate compactor (with a protective pad) over the pavers, and mist with water to activate the polymers.
Method 2: Interlocking Paver Base Panels
If you are looking to reduce the amount of heavy excavation and soil removal, interlocking paver base panels are an excellent modern alternative.
These lightweight, engineered panels replace the traditional 6-inch gravel base. After excavating just 3 to 4 inches, you compact the soil, lay down landscape fabric, and spread a thin 1/2-inch layer of leveling sand. The interlocking panels are then placed directly on top of the sand, providing a stable, flat platform for your pavers.
While this system significantly cuts down on physical labor and soil disposal, it is best suited for stable, well-draining soils. Learn more about this modern installation technique by reading How to Build a Concrete Paver Walkway – This Old House.
Method 3: Mortared Brick on Concrete
For commercial entryways or formal front walks where zero movement is desired, a mortared brick walkway over a poured concrete slab is the ultimate permanent structure.
This “wet-lay” method begins by pouring a reinforced concrete slab with proper slope and drainage. Once cured, a bed of mortar is spread over the concrete, and the bricks are set directly into the wet mortar. The joints are then filled with jointing mortar or grout.
While incredibly durable and resistant to weed growth, this method is highly rigid. If water gets beneath the slab in cold climates, the entire structure can crack, making professional site preparation absolutely critical.
Method 4: Permeable Crushed Limestone Base
If your yard is prone to pooling water or sits near a sensitive wetland area, a permeable crushed limestone base is the ideal drainage-first approach.
Instead of standard compactable road base and fine sand—which can trap water—this method utilizes clean, angular crushed limestone of various sizes. We lay down a thick sub-base of 1/2-inch crushed limestone, followed by a thin leveling layer of finer limestone chips.
The pavers are laid on top, and the joints are filled with clean, fine limestone gravel instead of polymeric sand. This allows rainwater to instantly drain directly through the joints and back into the ground, eliminating puddles entirely. For a hands-on look at a similar drainage-first project, check out DIY Limestone Paver Walkway | Step-by-Step Guide for a Long-Lasting Path — MAKER GRAY.
Crucial Ground Preparation and Maintenance for Massachusetts Soils
In Massachusetts, our soils contain high amounts of clay and silt, which hold onto moisture. When winter temperatures drop, this trapped water freezes and expands, causing a phenomenon known as “frost heave.” If your walkway’s base is too thin or poorly compacted, frost heave will quickly turn your flat path into an uneven, tripping hazard.
When working in towns like Concord, MA or Bedford, MA, we must design the base with extra care to ensure water drains away from the walkway. To see how we manage water flow on residential properties, read our Walkway Drainage Solutions Complete Guide. You can also explore local project examples, such as this paver project in Bedford, MA or these stone walkways in Concord, to see how professional drainage integration keeps regional hardscapes flat for decades.
Preventing Common Mistakes in Brick Paver Walkway Installation
To ensure your walkway stands the test of time, avoid these critical installation errors:
- Poor Compaction: Hand-tamping is rarely sufficient for a gravel base. Always use a commercial-grade plate compactor, working in thin 2-inch layers.
- Improper Slope: Walkways must slope away from your home’s foundation at a minimum rate of 1/4 inch per linear foot to prevent water damage.
- Skipping Edge Restraints: Without heavy-duty edging secured by spikes, the outer bricks will gradually drift outward into the lawn, causing the entire path to unravel.
- Neglecting Weed Prevention: Always lay down professional-grade landscape fabric beneath your gravel base to prevent weeds from taking root from the soil below.
Long-Term Maintenance and Care
To keep your brick paver walkway looking pristine, perform these simple maintenance tasks:
- Reapply Polymeric Sand: Every 3 to 5 years, wash out degraded sand from the joints and sweep in fresh polymeric sand to keep weeds out and lock the pavers in place.
- Power Washing: Clean your walkway annually in the spring to remove dirt, moss, and mildew. Avoid using high-pressure nozzles directly on the joint sand.
- Sealing: Applying a breathable, slip-resistant paver sealer every few years protects the bricks from fading under UV rays and prevents oil or leaf stains from penetrating the surface.
Frequently Asked Questions About Brick Walkways
How wide should a brick paver walkway be?
For a primary front entrance, a walkway should be at least 36 to 48 inches wide. A 48-inch width is highly recommended because it allows two people to walk side-by-side comfortably. For secondary garden paths, a width of 24 to 36 inches is standard. If wheelchair accessibility is a priority, ensure the path is at least 36 inches wide with a 60-inch turnaround area.
How long does a brick paver walkway last in Massachusetts?
When installed by professional hardscapers who understand local soil conditions and freeze-thaw cycles, a high-quality brick paver walkway can easily last 50 to 100 years. Because pavers are individual units, if a single brick ever cracks or settles, it can be easily lifted and replaced without having to tear up the entire pathway.
Can I install a brick paver walkway myself?
While a basic, straight garden path can be attempted as a DIY project, installing a main entry walkway is an incredibly strenuous, time-consuming process. It requires excavating tons of heavy soil, hauling gravel, and using specialized, heavy machinery like commercial plate compactors and diamond-blade saws.
For a flawless, long-lasting finish that boosts your home’s curb appeal, hiring professional hardscaping experts is highly recommended. To see examples of stunning, professionally built walkways in our region, check out this guide on walkway design in Wilmington.
Conclusion
A beautifully designed and correctly installed brick paver walkway transforms your home’s exterior, providing a safe, slip-resistant path that lasts for generations. While DIY guides make the process look simple, the key to longevity lies deep underground in the excavation, compaction, and drainage preparation—steps that require heavy machinery and years of local expertise.
At Boston Landscape Co., we have spent over 35 years installing durable, gorgeous hardscapes throughout Billerica, Stoneham, and the surrounding North Shore communities. Our team handles every phase of the project, from initial design and permitting to deep excavation and flawless paver laying.
Ready to elevate your home’s curb appeal with a stunning new walkway?
Contact Boston Landscape Co. today at +781-438-6690 or visit our website to Request a Free Estimate. You can also explore our full range of professional hardscaping services to see how we can bring your outdoor vision to life.
