Putting a Trampoline into the Ground: Top 6 Proven Steps
Bounce Safely: The Complete How-To for Installing an In-Ground Trampoline
Putting a trampoline into the ground is a great way to create a fun and safe outdoor play area for your family. Here’s a quick snapshot of what you need to know:
- Safety: Reduced fall height and injury risk.
- Aesthetics: Blends seamlessly with the landscape.
- Accessibility: Easy for children and those with physical limitations.
- Weather Resistance: Less exposure to wind and elements.
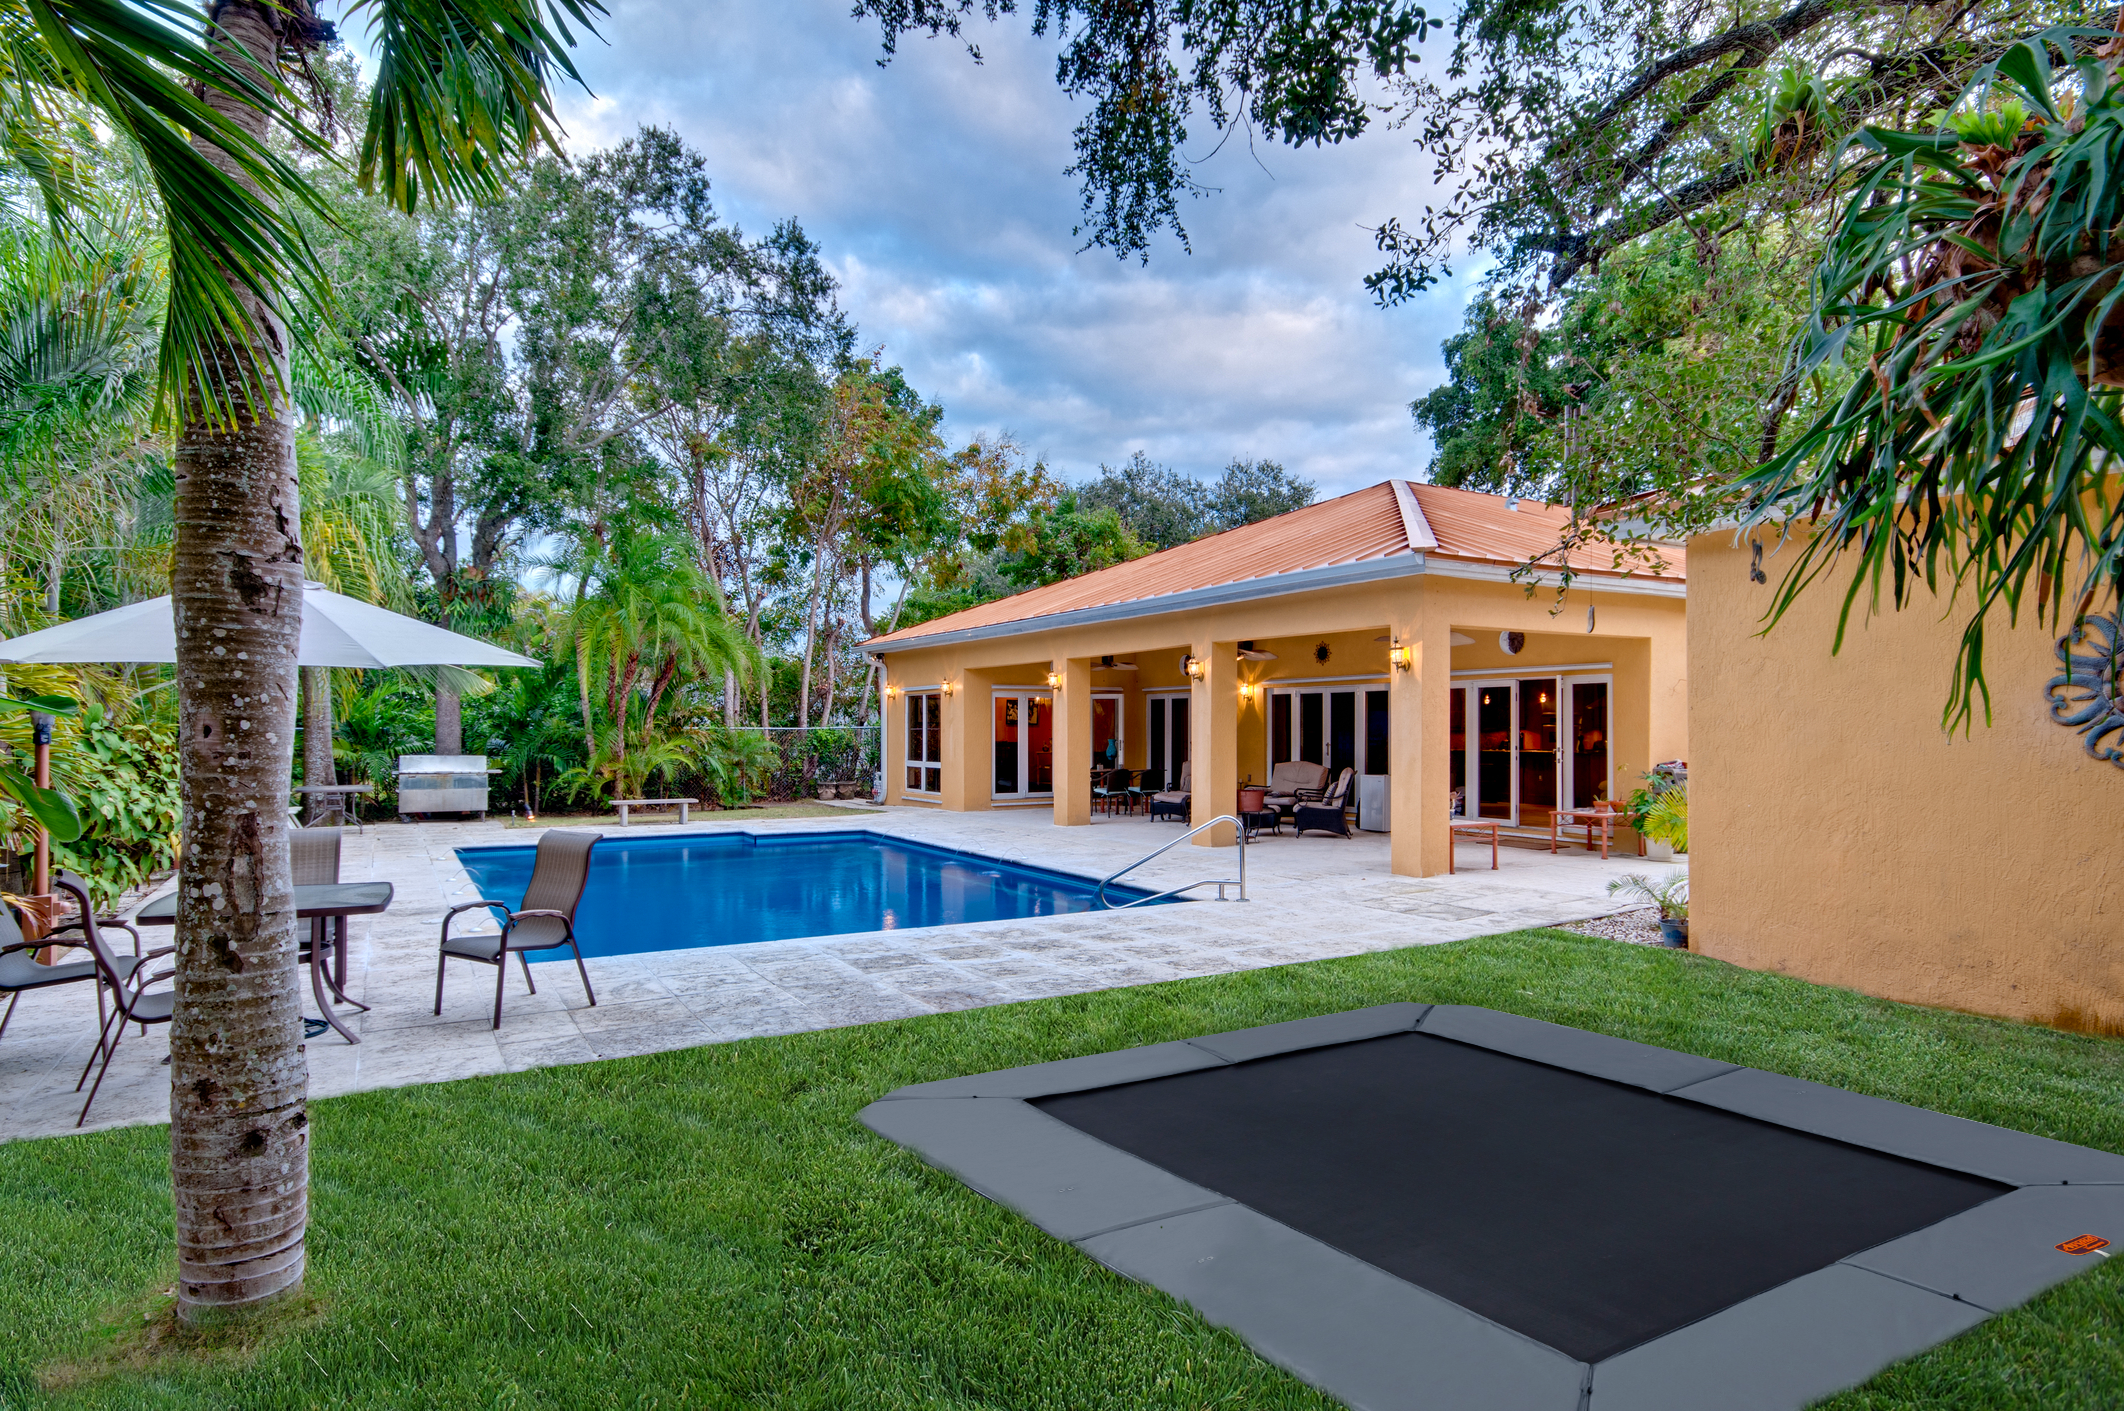
Installing an in-ground trampoline brings numerous benefits. By positioning the trampoline at ground level, the risk of falls from a height is significantly reduced, making it a safer option for active kids and providing peace of mind for parents. Aesthetically, in-ground trampolines blend seamlessly into your landscaping, creating a cleaner, less obstructive look in your backyard. They also eliminate the need for ladders, making the trampoline more accessible for everyone in the family.
Furthermore, in-ground trampolines are less likely to be affected by strong winds since they sit flush with the ground, which also contributes to their overall durability. This setup encourages playful outdoor activities, promoting physical fitness and fun for all ages.
I’m Steve Schumacher, the owner of Boston Landscape Co., with over three decades of experience in enhancing outdoor spaces. Throughout my career, I’ve specialized in putting a trampoline into the ground, ensuring the safest and most visually appealing installations for my clients. Let’s dig into how you can achieve this in your own backyard.
Must-know putting a trampoline into the ground terms:
– Inground Trampoline Company
– how to install an in ground trampoline
Tools and Materials Needed
Before you start putting a trampoline into the ground, gather all the necessary tools and materials to ensure a smooth installation process. Here’s what you’ll need:
Retaining Wall
A retaining wall is essential to prevent soil from collapsing into the trampoline pit. You can use:
- Concrete walls for a permanent solution.
- Non-permanent walls like AZEK or treated 2x4s for flexibility.
- Specially designed panels that fit your trampoline size.
Choose the retaining wall material based on your budget and long-term plans.
Trampoline Kit
Your trampoline kit should include:
- Frame and springs: Ensure these are sturdy and rust-resistant.
- Jump mat: The mat should be durable and weather-resistant.
- Safety pads: These cover the springs and edges to prevent injuries.
Make sure your kit matches the size and shape of the hole you plan to dig.
Shovel and Backhoe
For digging the hole, you’ll need:
- Shovel: Essential for manual digging and fine-tuning the hole.
- Backhoe: Ideal for larger projects to speed up the excavation process.
If you’re not familiar with operating a backhoe, consider hiring a professional to avoid accidents and ensure precision.
Drainage Pipes
Proper drainage is crucial to prevent water pooling under your trampoline. Use:
- Perforated pipes: These help channel water away.
- Storm drain connections: Direct excess water to a safe drainage area.
Installing good drainage will protect your trampoline frame from rust and extend its lifespan.
Level
A level is indispensable for ensuring your trampoline sits evenly in the ground. Use:
- Bubble level: Simple and effective for small adjustments.
- Laser level: More accurate, especially for larger installations.
Ensuring the trampoline is level prevents uneven wear and adds to the safety of the jumping area.
With these tools and materials at hand, you’re ready to start the installation. Next, we’ll walk you through the detailed steps to ensure a successful setup.
Step-by-Step Guide to Putting a Trampoline into the Ground
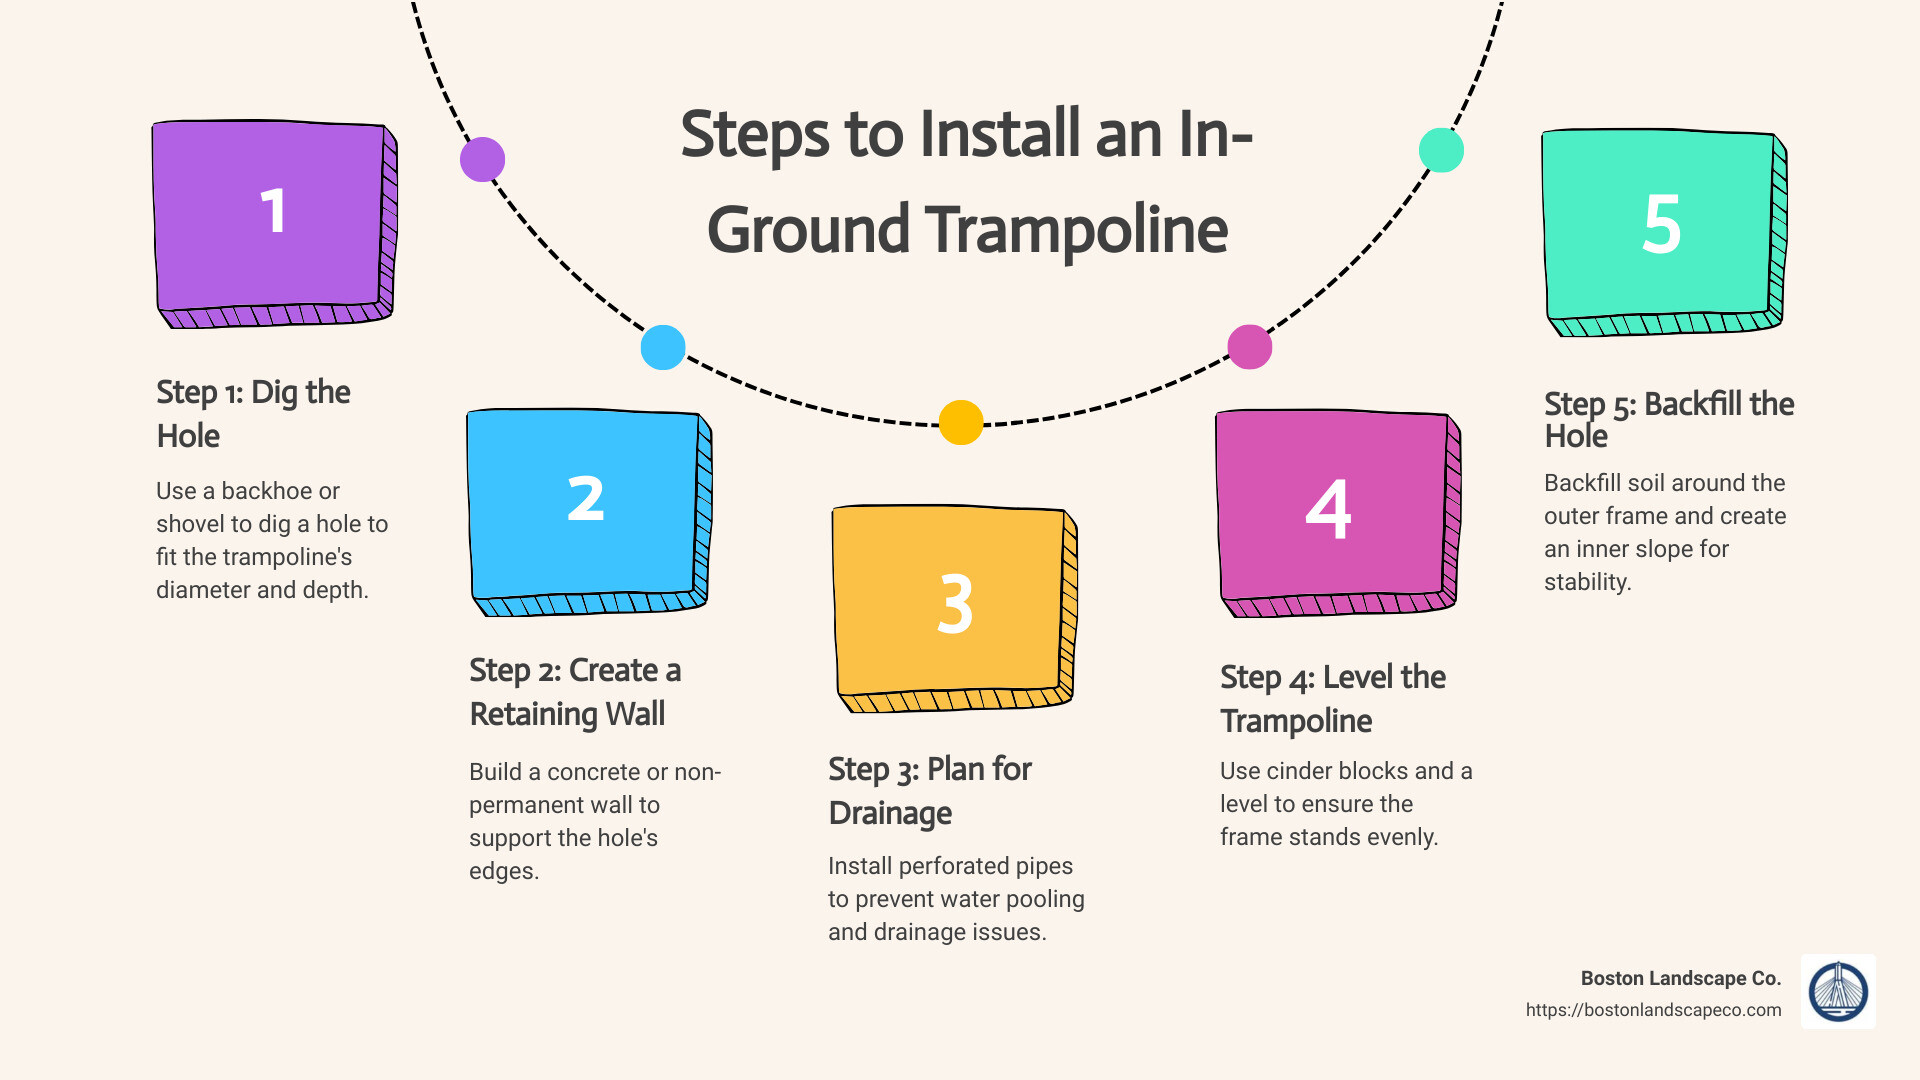
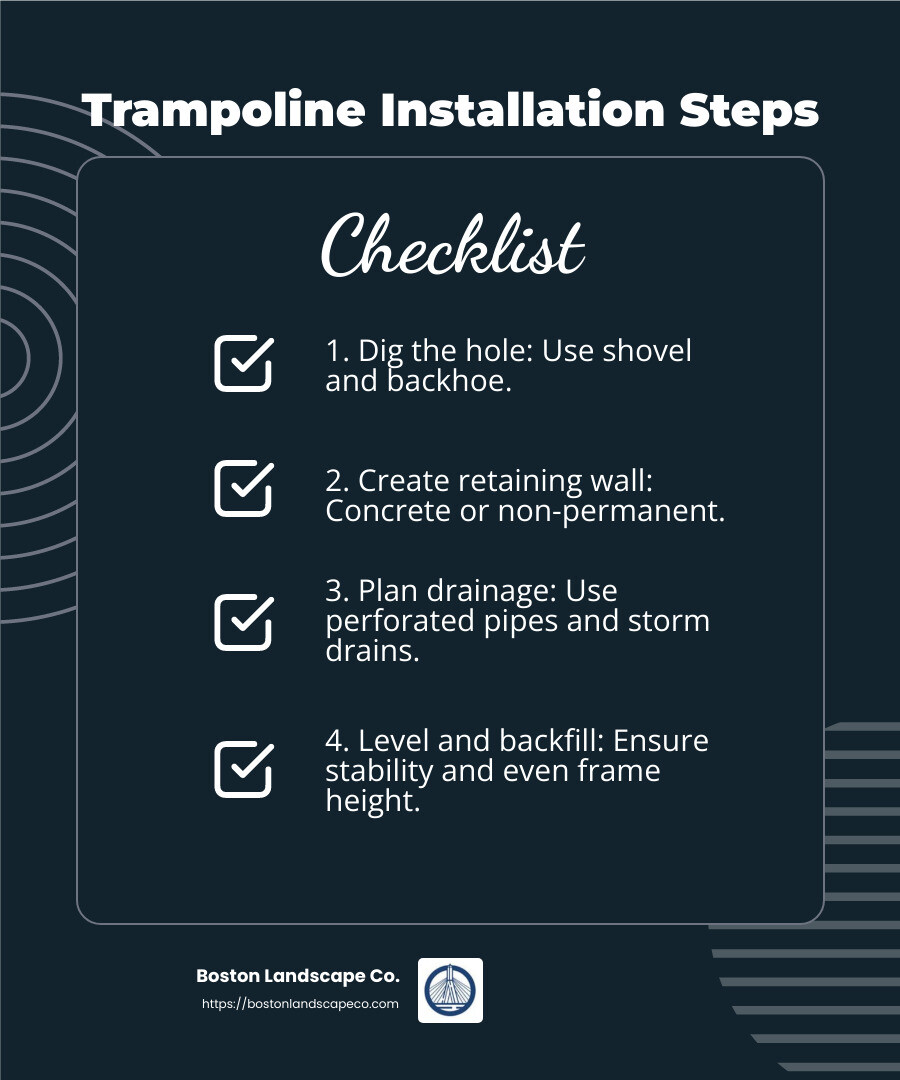
Step 1: Dig the Hole
Start by marking the area where you want to install the trampoline. Ensure the hole is slightly larger than the trampoline frame to allow for easy installation and backfilling.
- Diameter: The hole should be about 2-5 inches wider than the trampoline frame.
- Depth: Consult your trampoline manual for exact depth. Generally, the outer frame depth is around 9-10 inches, while the inner hole (bounce area) is about 36 inches deep.
Use a shovel for smaller projects or a backhoe for larger digs. Remember to blue-stake before digging to avoid underground utilities.
Step 2: Create a Retaining Wall
A retaining wall prevents soil from collapsing into the trampoline pit. You have options:
- Concrete Wall: Permanent and sturdy, ideal for long-term installations.
- Non-Permanent Wall: Materials like AZEK or treated 2x4s offer flexibility and are easier to install.
Assemble the retaining wall according to your chosen material. Make sure it’s secure to avoid soil erosion.
Step 3: Plan for Drainage
Proper drainage is crucial to prevent water pooling, which can cause rust and frame instability.
- Perforated Pipes: Lay these at the bottom of the hole to channel water away.
- Storm Drain or Gutter: Connect the perforated pipes to a storm drain or gutter system to direct excess water safely away from the trampoline area.
Good drainage extends the lifespan of your trampoline and keeps the jumping area safe.
Step 4: Level the Trampoline
Place cinder blocks or other footings at the bottom of the hole to support the trampoline frame.
- Level: Use a bubble level or laser level to ensure the trampoline sits evenly. Adjust the cinder blocks or footings as needed.
- Frame Height: The top of the trampoline frame should be flush with ground level for safety and aesthetics.
Step 5: Backfill the Hole
Once the trampoline frame is level, begin backfilling around the outer frame.
- Soil Compaction: Compact the soil as you go to ensure stability.
- Outer Frame: Fill the space between the retaining wall and the outer frame.
- Inner Slope: Make sure the inner slope of the hole is gradual to avoid soil collapsing into the bounce area.
Step 6: Attach the Jump Mat
Now, attach the jump mat to the frame using the springs.
- Jump Mat: Follow the assembly instructions provided in your trampoline kit.
- Springs: Start by attaching springs at the four corners and the middle of each side for even tension. Then, attach the remaining springs.
Once the jump mat is securely attached, do a quick test jump to ensure everything is stable.
By following these detailed steps, you can ensure a safe and enjoyable trampoline experience for years to come. Next, we’ll cover important safety considerations to keep in mind.
Safety Considerations
When installing an in-ground trampoline, safety should be your top priority. Here are some key safety precautions to ensure a secure and enjoyable jumping experience:
Netting
Safety Netting: Even though an in-ground trampoline is flush with the ground, it’s wise to install safety netting. This prevents users from bouncing off and landing on hard surfaces. Many in-ground trampoline kits come with netting options.
Tip: Choose netting that attaches at the edge of the jumping mat to keep springs outside the bounce area, providing extra safety.
Clearance
Adequate Clearance: Ensure there is enough space around the trampoline. Ideally, there should be 3-4 feet of clearance on all sides to allow the safety net to flex and to keep jumpers away from any obstacles.
Fact: According to experts, having enough clearance significantly reduces the risk of collisions and injuries.
Supervision
Adult Supervision: Always supervise children when they are using the trampoline. An adult can ensure that safety rules are followed and can respond quickly in case of an accident.
Case Study: A family reported fewer injuries after they started requiring adult supervision for all trampoline use. This simple step can make a big difference.
Safety Precautions
Regular Inspections: Conduct monthly safety inspections to check for loose springs, torn mats, and rust. Address any issues promptly to maintain the trampoline’s safety and performance.
Weather Protection: Use weather-resistant covers to protect the trampoline from extreme weather conditions. This helps in preventing rust and wear, ensuring the trampoline remains safe to use.
Proper Use: Educate all users on the proper way to use the trampoline. This includes no flips unless supervised, one jumper at a time, and no roughhousing.
By following these safety considerations, you can create a safe and enjoyable environment for everyone. Next, we’ll cover common issues and their solutions to help you maintain your in-ground trampoline.
Common Issues and Solutions
When putting a trampoline into the ground, you may encounter several common issues. Here’s how to solve them:
Erosion and Soil Stability
Soil Erosion: Over time, the soil around your trampoline can erode, especially after heavy rains. This can lead to instability.
Solution: Use a retaining wall made of concrete or treated wood to hold the soil in place. Regularly check the soil around the trampoline and add more if needed.
Sinkholes: Poor soil stability can cause sinkholes under or around your trampoline.
Solution: Compact the soil well during installation. Use a layer of gravel at the bottom of the hole to improve drainage and soil stability.
Frame Instability: An unstable frame can make the trampoline unsafe.
Solution: Ensure the ground is level before installation. Use cinder blocks or other sturdy materials to support the frame. Regularly inspect the frame for any signs of instability.
Snake Prevention
Snake Traps and Repellants: Trampolines can sometimes attract snakes, especially if the area around them is not well-maintained.
Solution: Use snake traps and repellants around the trampoline. Keep the surrounding area clean and free of debris.
Yard Maintenance: Regular yard maintenance can help prevent snakes from taking up residence near your trampoline.
Solution: Mow the lawn regularly, remove piles of leaves or wood, and keep the grass short around the trampoline.
Water Drainage
Drainage Pipes: Proper drainage is crucial to prevent water from pooling under your trampoline, which can cause rust and other damage.
Solution: Install perforated drainage pipes around the trampoline to guide water away. Connect these pipes to a storm drain or gutter system.
Water Damage: Standing water can damage the trampoline frame and mat, leading to rust and decreased lifespan.
Solution: Ensure proper drainage and use weather-resistant covers when the trampoline is not in use. Regularly check for and remove any standing water.
Rust Prevention: Rust can weaken the trampoline frame and springs, making it unsafe.
Solution: Apply rust protection to the frame and springs. Regularly inspect these parts for signs of rust and address any issues immediately.
By addressing these common issues, you can ensure your in-ground trampoline remains safe and functional for years to come. Up next, we’ll tackle frequently asked questions about putting a trampoline into the ground.
Frequently Asked Questions about Putting a Trampoline into the Ground
Can You Use a Regular Trampoline?
No, you shouldn’t use a regular trampoline for an inground installation.
Why? Regular trampolines are designed to stand above the ground on legs. When you put one into the ground, it lacks the proper support and ventilation, which can lead to poor performance and safety hazards.
Instead, use an inground trampoline kit. These kits come with retaining walls and vented pads that allow for proper air flow and support.
How Deep Should the Hole Be?
The depth of the hole depends on the trampoline size. Generally, you need to dig a hole about 3 feet deep.
- Outer Frame Depth: About 9 to 10 inches.
- Inner Hole Depth: Around 36 inches.
Make sure to consult the specific dimensions for your trampoline model. Proper ventilation is crucial, so follow the guidelines in your inground kit.
Do Inground Trampolines Attract Snakes?
Yes, they can, but you can prevent this with proper yard maintenance.
Snake Prevention Tips:
– Use Snake Repellants: Place them around the trampoline area.
– Regular Yard Maintenance: Mow the lawn, remove debris, and keep the grass short.
– Snake Traps: Set these up around your trampoline to catch any intruders.
By keeping the area clean and using repellants, you can minimize the risk of snakes making a home near your trampoline.
Next, we’ll explore the safety considerations you need to keep in mind when installing and using your inground trampoline.
Conclusion
Enhancing your outdoor space with an inground trampoline is a fantastic way to combine fun and safety. At Boston Landscape Co., we specialize in changing backyards into exciting and secure play areas that the whole family can enjoy.
Why Choose Boston Landscape Co.?
Comprehensive Services: We offer a full range of services from initial consultation to final installation. Our team is committed to providing a seamless experience, ensuring your trampoline is installed correctly and safely.
Expertise: Our certified installers have the knowledge and skills to handle every aspect of the installation process. We use high-quality materials and proven techniques to ensure your trampoline is both durable and safe.
Customization: We work closely with you to design a trampoline setup that fits your specific needs and complements your outdoor space. Whether you have a small yard or a larger area, we can create a layout that maximizes your available space.
Safety First: Safety is our top priority. Our inground trampolines are designed to minimize the risk of injury with features like flush-to-the-ground installation and durable retaining walls. We also provide guidance on yard maintenance and snake prevention to keep your play area safe.
Aesthetic Appeal: Our inground trampolines blend seamlessly with your landscape, preserving the natural beauty of your backyard. Unlike bulky above-ground models, our trampolines offer a sleek, understated appearance.
Durability: Constructed from high-quality materials, our trampolines are built to withstand the elements and provide years of enjoyment. You can trust that your investment will last, offering endless fun for your family.
Ready to Transform Your Backyard?
If you’re ready to lift your backyard with an inground trampoline, contact Boston Landscape Co. today. Let’s create a safe, fun, and beautiful outdoor space that your family will love.
For more information on our services and to schedule a consultation, visit our inground trampoline service page. Let’s make your backyard the ultimate destination for fun and safety!
