Installation of Artificial Turf: Top Benefits in 2025
Installation of artificial turf offers a range of benefits that transform your outdoor spaces into lush, green oases without the hassle of natural grass upkeep. For those curious about this process, here’s what you need to know:
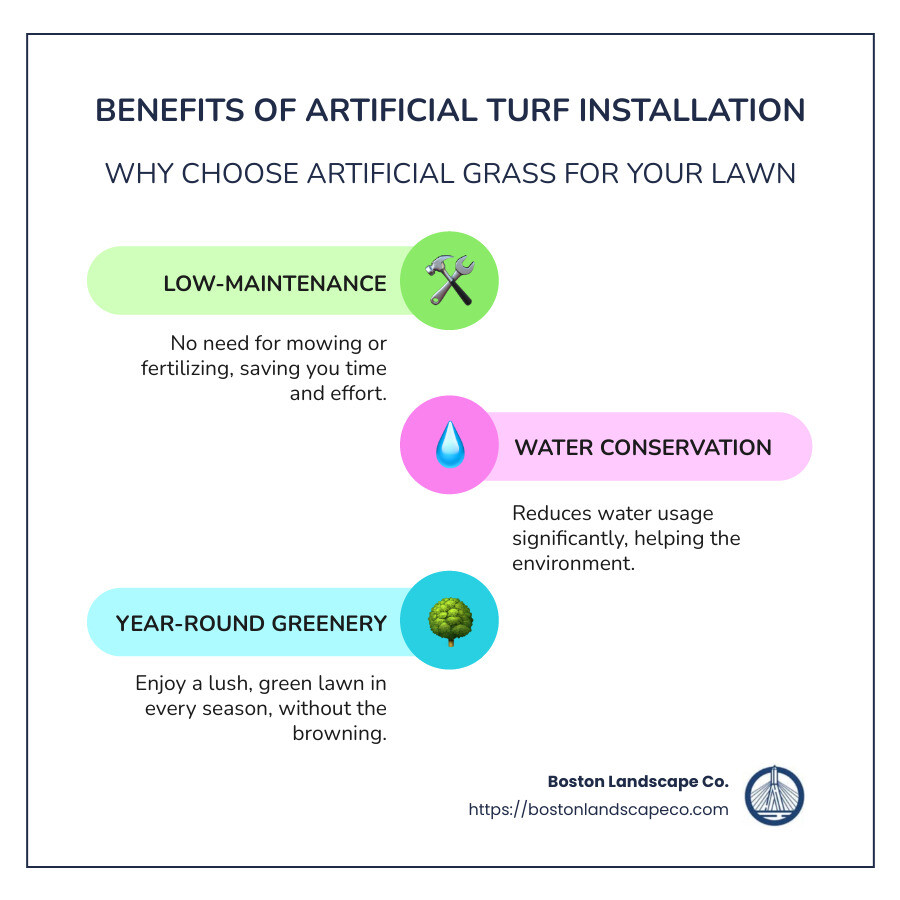
- Benefits of Artificial Turf:
- Low-Maintenance: No mowing or fertilizing required.
- Water Conservation: Save thousands of gallons of water annually.
- Year-Round Greenery: Always looks pristine, no matter the season.
Transitioning to artificial turf means spending less time on lawn care and more time enjoying your outdoor haven. If you crave a vibrant, eco-friendly lawn with minimal effort, artificial turf might be your ideal solution.
I’m Steve Schumacher, with over thirty years of experience in landscaping through Boston Landscape Co. Throughout my career, I’ve mastered installation of artificial turf, helping homeowners achieve functional and attractive outdoor spaces. Let’s explore how this versatile option can improve your property further.
Installation of artificial turf terms at a glance:
– synthetic lawn base
– synthetic lawn maintenance
– synthetic lawn cost
Planning Your Artificial Turf Installation
Before diving into the installation of artificial turf, planning is crucial. A well-thought-out plan ensures a smooth process and a beautiful result. Here’s how to start:
Measure Your Area
The first step is to measure the area where you’ll install the turf. Use a tape measure to get the length and width of the space. Multiply these numbers to find the total square footage. This will help you determine how much turf you need to order.
Artificial grass typically comes in rolls that are 2m or 4m wide and up to 25m long. Plan your layout to minimize waste and seams, which can save you money and effort.
Drainage Considerations
Good drainage is key to a successful turf installation. Poor drainage can lead to water pooling, which can damage your turf over time.
- Check Existing Drainage: Walk around the area after a rain to see where water collects.
- Improve Drainage: If needed, consider adding a layer of gravel or crushed rock under the turf. This base layer helps water flow away from your home and prevents flooding.
Tools Required
Having the right tools makes the installation process much easier. Here’s a list of essential tools you’ll need:
- Tape Measure: For accurate measurements.
- Sharp Knife: To cut the turf to size.
- Spade or Shovel: To excavate the area and spread base materials.
- Hammer: For securing the turf with nails or pins.
- Bristle Broom or Grass Rake: To brush the turf and spread infill evenly.
- Gloves: To protect your hands during installation.
- Pins/Nails: To secure the turf edges.
- Joining Tape and Adhesive: To connect turf pieces seamlessly.
- Roller or Vibrating Plate: To compact the base material (available for hire).
Optional tools include a weed block cloth to prevent weed growth and a shockpad for added cushioning, especially on concrete surfaces.
Planning your artificial turf installation carefully will set the stage for a successful project. Next, we’ll dig into preparing the ground to ensure your turf stays beautiful and functional for years to come.
Preparing the Ground for Artificial Turf
Before you lay down your artificial turf, it’s crucial to prepare the ground properly. This ensures a smooth, long-lasting installation. Here’s how to do it right:
Weed Removal
Start by clearing the area of any existing vegetation. This includes grass, weeds, and other plants.
- Kill Existing Grass: Use a shovel to remove old grass and dig down 2-4 inches to remove the topsoil. This helps prevent grass from growing back.
- Use a Weed Barrier: To further prevent future weed growth, consider laying down a high-quality weed barrier. This fabric allows for drainage while stopping weeds from poking through.
Base Preparation
A solid base is key to a successful artificial turf installation. It ensures proper drainage and prevents the turf from shifting.
- Choose the Right Base Material: Use materials like crushed rock, gravel, or decomposed granite. These provide excellent drainage and a stable foundation.
- Spread the Base Material: Fill the excavated area with about 3-4 inches of your chosen base material. Use a shovel or sand spreader to distribute it evenly.
- Ensure Proper Drainage: Create a slight slope in the base to direct water away. This prevents pooling and keeps your turf dry.

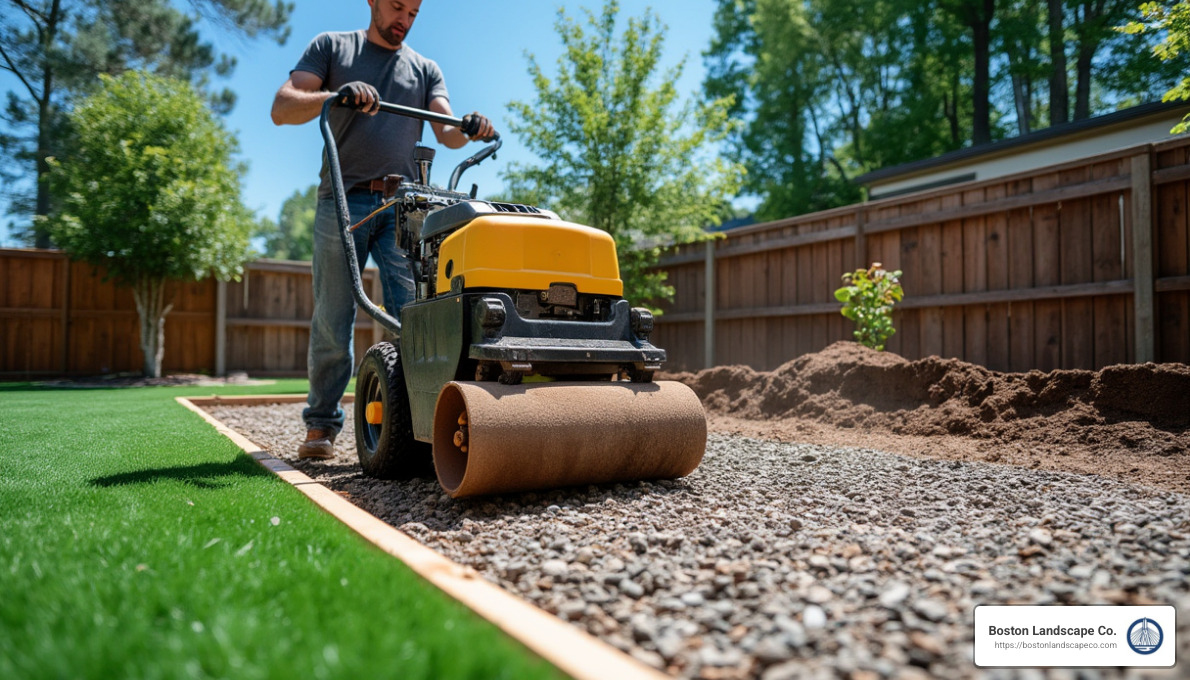
Compacting the Base
Compacting the base ensures stability and prevents shifting over time.
- Use a Compactor: Rent a roller or vibrating plate to compact the base material. This makes the base firm and solid.
- Check for Levelness: After compacting, check for any uneven spots. The base should be smooth and level to support the turf.
- Optional: Add a Weed Barrier: After compacting, you may choose to add another layer of weed barrier for extra protection against weeds.
By following these steps, you’ll create a strong foundation for your artificial turf. This groundwork is essential for a beautiful and durable lawn. Next, we’ll discuss how to lay your turf and secure it in place.
Installation of Artificial Turf
Once your base is ready, it’s time to move on to the installation of artificial turf. This step involves laying the turf, fixing the seams, and securing it all in place. Let’s break it down.
Laying the Turf
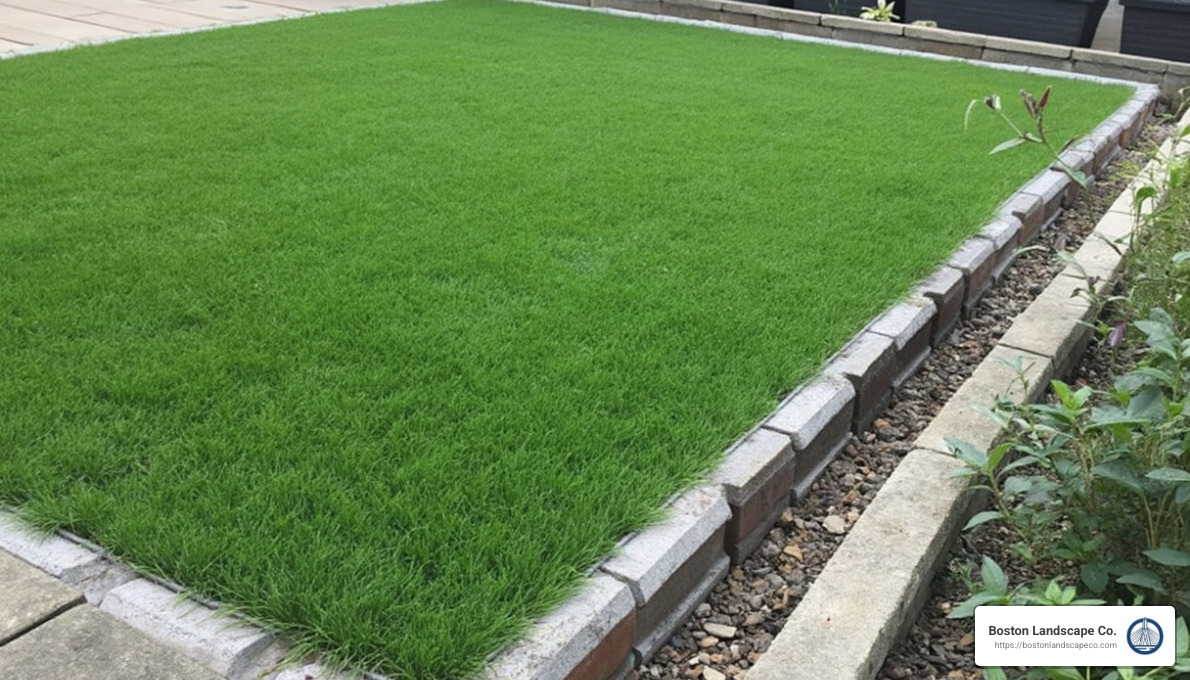
Start by rolling out your artificial turf over the prepared base. Treat it like a carpet. Make sure the blades are all facing the same direction for a natural look.
- Align the Turf: Lay each piece carefully, ensuring they align properly. This gives a uniform appearance.
- Cut to Fit: Use a sharp utility knife to trim the edges. This helps the turf fit snugly against borders or edges. Remember to cut from the back for more precision.
Fixing the Seams
Seaming is crucial for a seamless look. It’s where two pieces of turf meet.
- Use Seam Tape: Lay the seam tape down the middle of where the two pieces meet.
- Apply Adhesive: Spread adhesive on the tape and press the turf edges onto it. This holds the pieces together securely.
- Check Alignment: Make sure the blades of grass from each piece blend nicely together. This avoids visible lines.
Securing the Turf
Now that everything is laid out and seamed, it’s time to secure the turf.
- Nail Down the Edges: Use 4 to 6-inch galvanized nails around the perimeter. Space them about 6 inches apart.
- Secure the Interior: For added stability, place nails throughout the turf. Keep them about 24 inches apart.
- Brush the Turf: Use a broom to brush the blades. This helps them stand upright and look more natural.
By following these steps, you’ll have a securely installed artificial turf that looks fantastic. Next, we’ll cover how to maintain your new lawn and keep it looking great.
Post-Installation Maintenance and Care
Congratulations! You’ve installed your artificial turf. Now, let’s keep it looking fresh and fabulous with some post-installation maintenance and care.
Regular Cleaning
Keeping your turf clean is simple. Regular cleaning helps it stay vibrant and lasts longer. Here’s how:
- Remove Debris: Use a leaf blower or a soft-bristle broom to clear leaves and twigs. This prevents mold and keeps the turf looking tidy.
- Rinse the Turf: Occasionally, hose down the turf to wash away dust and pollen. This is especially important if it hasn’t rained in a while.
- Spot Clean: For spills or stains, use a mild detergent mixed with water. Gently scrub with a sponge and rinse thoroughly.
Brushing
Brushing your turf helps maintain its lush appearance. It keeps the grass blades standing tall and natural.
- Routine Brushing: Use a stiff-bristle broom to brush against the grain of the turf. Do this once a month to prevent matting.
- High-Traffic Areas: Pay extra attention to areas that get a lot of foot traffic. Brush these spots more frequently to keep them looking fresh.
Handling Pet Waste
If you have pets, handling their waste is crucial for a clean and odor-free yard.
- Pet Urine: Thanks to the turf’s drainage system, urine won’t be a problem. Just rinse the area with a hose weekly to remove any residue.
- Pet Feces: Let solid waste dry a bit before picking it up with a bag or scooper. For diarrhea, remove as much as possible and rinse thoroughly.
By following these simple maintenance tips, your artificial turf will stay beautiful and functional for years. Next, let’s tackle some of the most common questions about installing artificial turf.
Frequently Asked Questions about Installation of Artificial Turf
When considering the installation of artificial turf, many questions arise about the preparation and materials needed. Let’s address some of the most common concerns.
What do you put under artificial turf before laying?
Before laying artificial turf, it’s important to have the right foundation. Here’s what you need:
- Weed Barrier: This is an optional but recommended layer. A weed barrier fabric helps prevent unwanted growth beneath your turf, saving you headaches in the long run.
- Base Material: A solid base is crucial for proper drainage and stability. Typically, a mix of crushed rock, gravel, or decomposed granite is used. Aim for a 3- to 4-inch layer to ensure a smooth and even surface.
How do you prepare ground for artificial grass?
Preparing the ground is a critical step in the installation of artificial turf. Here’s a simple breakdown:
- Excavation: Start by removing the existing grass, weeds, and debris. You’ll want to dig down about 3 inches to make room for the base materials.
- Leveling: Once excavated, ensure the area is level. This prevents water pooling and ensures a smooth surface for your turf.
- Base Preparation: Spread your chosen base material evenly. Compact it using a roller or vibrating plate to create a firm and stable foundation.
What are the steps to installing artificial turf?
Installing artificial turf involves several key steps. Here’s a quick guide:
- Planning: Measure your area carefully. Plan for drainage and consider how much turf you need to avoid waste.
- Base Preparation: As mentioned, a well-prepared base is essential. Ensure it’s compacted and level.
- Laying Turf: Roll out your turf over the prepared base. Make sure the blades are all facing the same direction for a uniform look.
- Fixing Seams: If using multiple pieces, glue the seams with self-adhesive tape or adhesive. This keeps the turf pieces securely together.
- Securing Turf: Use galvanized nails or spikes to secure the turf around the edges and throughout the area. Space them about 6 inches apart for stability.
By following these steps, you can ensure a successful and long-lasting installation. Up next, we’ll explore the benefits of choosing Boston Landscape Co. for your turf project.
Conclusion
Choosing to install artificial turf is a smart move for anyone looking to improve their outdoor space with minimal upkeep. At Boston Landscape Co., we understand that the installation of artificial turf can feel overwhelming, whether you’re considering a DIY approach or hiring professionals.
DIY vs. Professional Installation
DIY installation can be a rewarding project for those who enjoy hands-on work and want to save on labor costs. However, it requires careful planning and execution to ensure a flawless finish. You’ll need to be comfortable with tasks like excavation, base preparation, and cutting turf to fit your space.
On the other hand, opting for professional installation with Boston Landscape Co. guarantees expertise and precision. Our team handles everything from site preparation to final touches, ensuring your turf is installed correctly and efficiently. Plus, with over 24 years of experience in Massachusetts, we bring a level of quality and reliability that’s hard to match.
Benefits of Artificial Turf
Artificial turf offers numerous advantages:
- Low Maintenance: Say goodbye to mowing, watering, and fertilizing. Your weekends are yours again!
- Durability: Designed to withstand heavy use and harsh weather, artificial turf stays vibrant and intact for years.
- Water Conservation: In drought-prone areas, artificial turf is a great way to conserve water while maintaining a green lawn.
Choosing Boston Landscape Co. means investing in a high-quality installation that provides long-term satisfaction. Our products come with up to a 15-year warranty, offering peace of mind.
Ready to transform your landscape? Contact us today to get started with your artificial turf project!
