Stone walkway design: 10 Stunning Ideas for 2025 Success
The Path to Outdoor Change
Stone walkway design is more than just creating a way to get from point A to point B—it’s about crafting a journey through your landscape that improves both functionality and beauty.
Quick Guide to Stone Walkway Design:
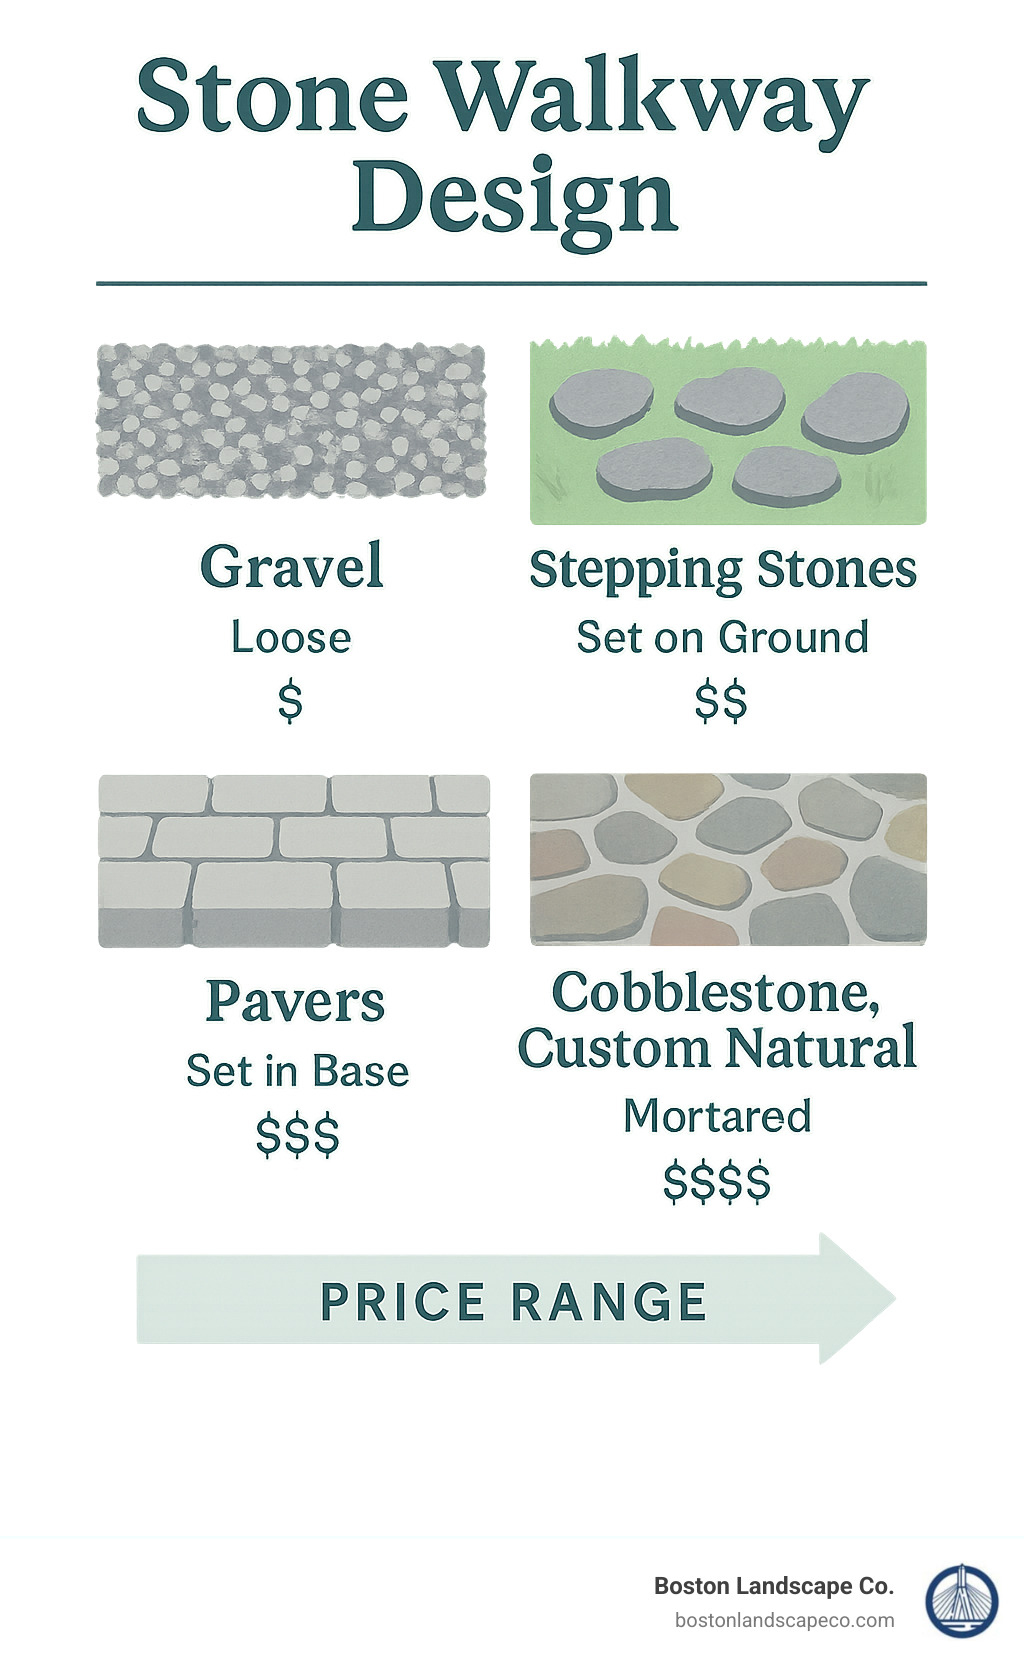
– Materials: Choose from flagstone, pavers, cobblestone, gravel, or stepping stones
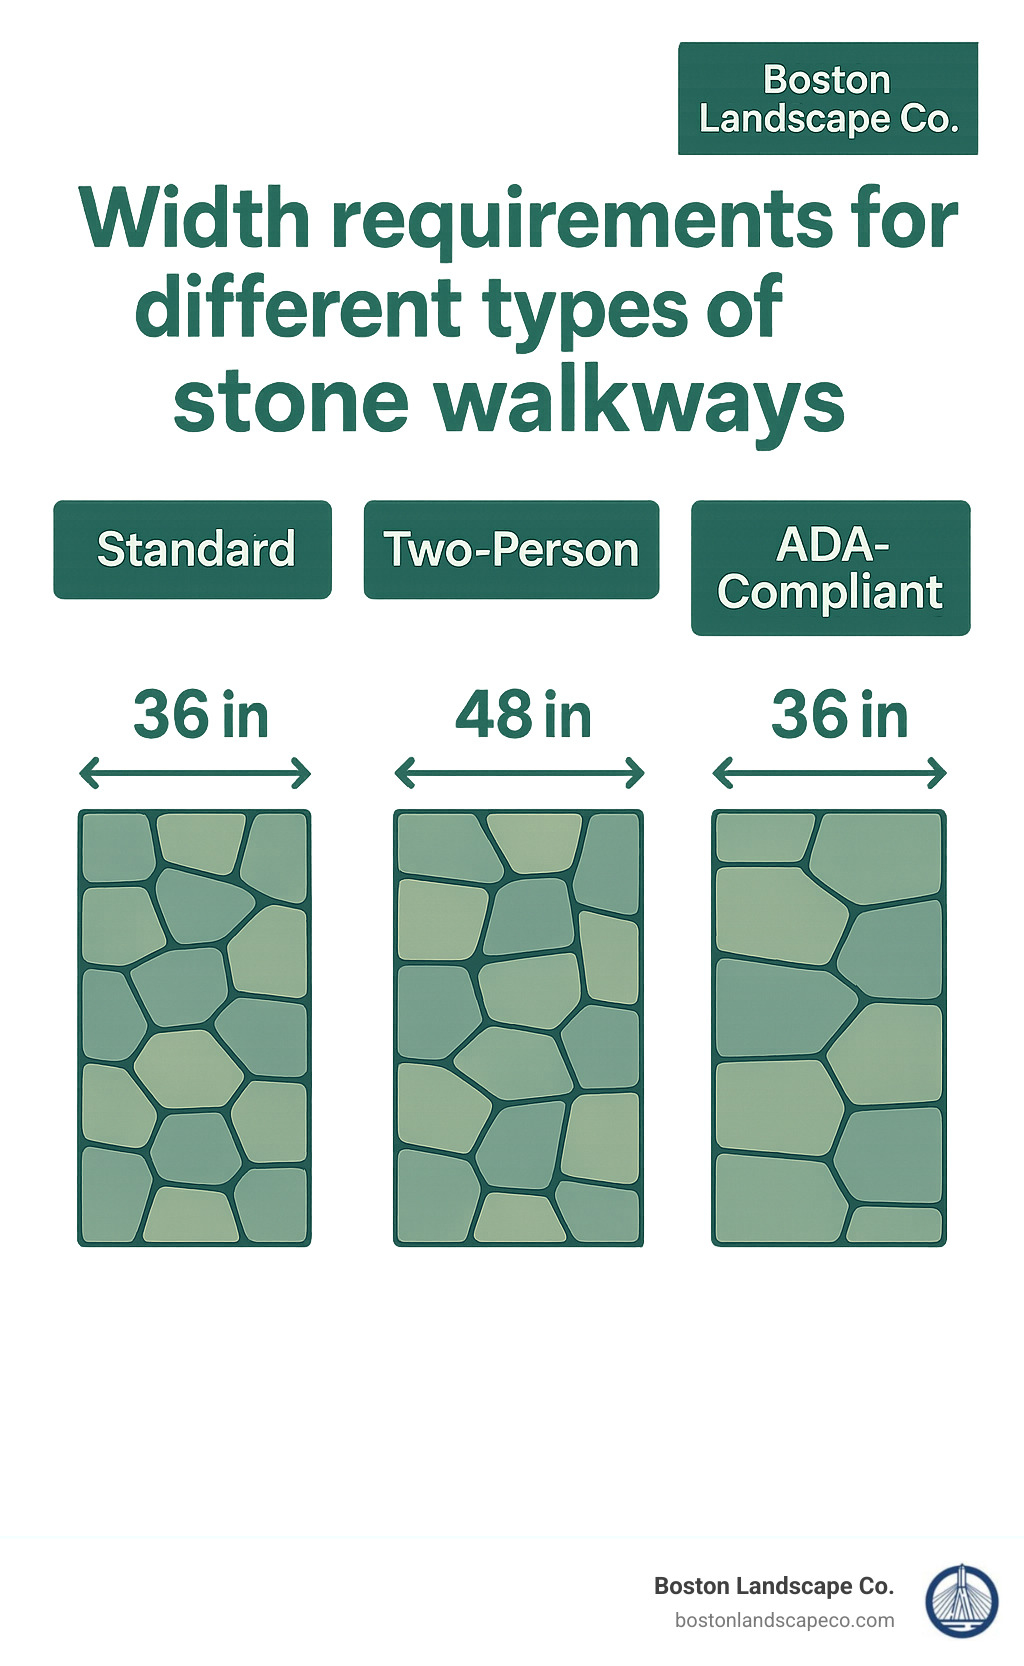
– Width: Standard walkway is 36″ wide; 48″ for two people side-by-side
– Base: 4-6″ of compacted gravel with 2″ of sand on top
– Drainage: Slope 1/4″ per foot away from structures
– Installation: Either DIY ($2.50-$3.50/sq ft) or professional ($12-$45/sq ft)
Whether you’re looking to boost curb appeal, create a meandering garden path, or establish a functional connection between outdoor spaces, a well-designed stone walkway adds structure and character to your property year-round.
“Ever walked into a backyard that just felt right? Where everything had its place, and the space invited you to linger? That’s the magic of thoughtful hardscape design at work,” notes one of our clients from Chelsea who transformed their mail-retrieval routine into a daily garden exploration with a winding bluestone path.
Stone walkways stand the test of time both in durability and style. Unlike other landscape elements that require seasonal replanting or frequent maintenance, a properly installed stone path can last for decades while continuing to complement your evolving garden design.
I’m Steve Schumacher, owner of Boston Landscape Co with over three decades of experience creating custom stone walkway designs that withstand New England’s challenging freeze-thaw cycles while maintaining their beauty and functionality.
Stone walkway design terminology:
– Brick patio installation
– Retaining wall construction
– Outdoor kitchen design
Stone Walkway Design Fundamentals
Ever wandered down a path that just felt right under your feet? That’s no accident! At Boston Landscape Co., we’ve created hundreds of stone walkways throughout Medford, Winchester, and beyond, and we’ve learned that great paths begin with solid fundamentals.
A thoughtfully designed stone walkway does more than connect two points—it guides visitors through your landscape, protects your lawn from wear and tear, and adds a touch of architectural charm to your outdoor space. Before you start selecting stones or mapping out routes, let’s explore the essentials that make a walkway both beautiful and functional.
Primary Stone Walkway Design Types
When planning your stone walkway design, you’ll first need to choose between two main installation methods:
Dry-laid vs. Mortar-set walkways offer different benefits for our New England climate. Dry-laid paths sit on beds of sand and gravel without mortar, allowing them to gently shift during our freeze-thaw cycles—perfect for Massachusetts winters. Mortar-set paths create a more permanent installation but can crack during harsh winters unless they’re properly built with expansion joints.
“Most of our Lexington clients prefer dry-laid stone walkways,” our lead hardscape designer often tells homeowners. “They’re more forgiving in our climate, and if a stone ever needs replacing, it’s a simple fix rather than a major repair.”
Stone thickness matters more than you might think. For regular foot traffic, we typically recommend stones that are 2-3 inches thick. Thinner stones might crack under pressure (especially during winter frost heaves), while unnecessarily thick stones just add weight and cost to your project.
Consider your foot-traffic levels when designing your path. The walkway connecting your driveway to your front door needs to be more robust and wider than that charming side path leading to your garden sanctuary. High-traffic areas deserve extra attention to base preparation and stone selection.
Stone Walkway Design Patterns
The pattern you choose dramatically affects both the look and performance of your stone walkway design:
Running bond patterns create a classic brick-like appearance where each stone is offset from those in adjacent rows. This traditional look isn’t just pretty—it creates a structurally sound walkway that distributes weight evenly.
Herringbone arrangements form distinctive V-shaped patterns that catch the eye and provide excellent structural integrity. We often recommend this for high-traffic areas where both strength and style matter.
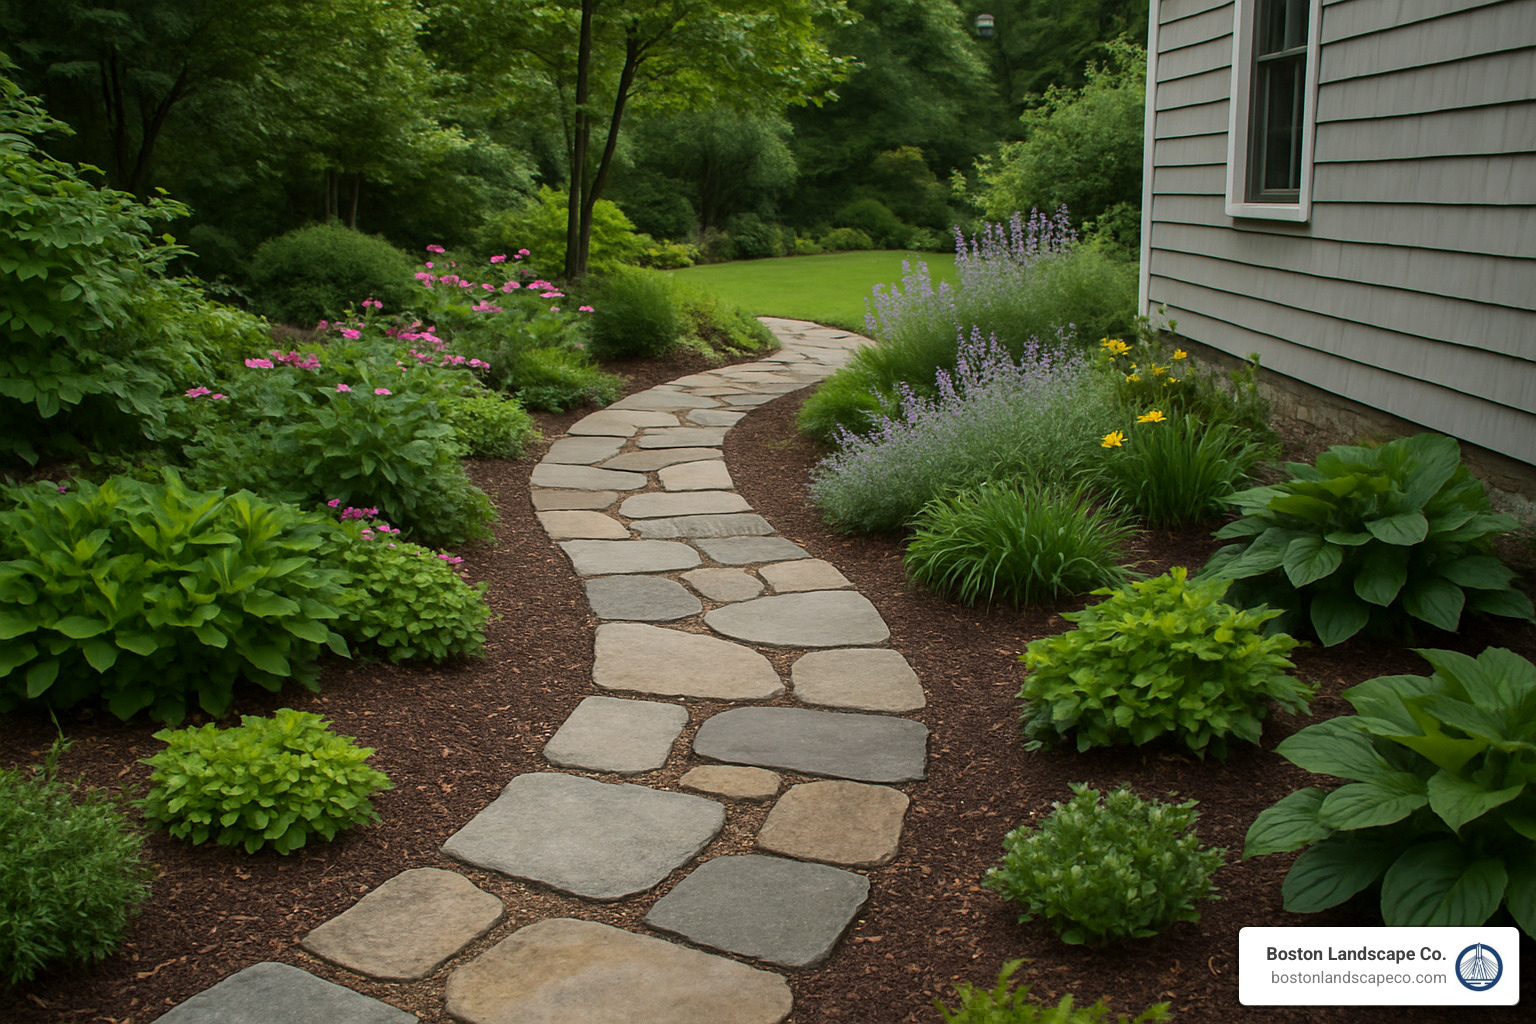
Crazy-pave (or irregular) patterns fit stones together like puzzle pieces, creating a natural, organic look. These paths feel right at home in cottage gardens or woodland settings, where they complement the casual beauty of nature.
Lattice patterns arrange stones in diamond or grid formations with spaces for gravel or small plants between them. These are fantastic for creating permeable walkways that allow water to drain through rather than run off.
The choice between curved and straight walkways significantly impacts your landscape’s mood. Straight paths create a sense of formality and direct movement—perfect for traditional home styles. Curved paths, on the other hand, invite exploration and create a more relaxed, natural feel that complements informal garden designs.
When considering materials, think about permeability for proper drainage, slip resistance for safety (especially important for families with older adults), and how your chosen stone will match the style of your home and existing landscape elements.
Whether you’re dreaming of neat flagstone, classic brick pavers, charming cobblestone, practical gravel, or playful stepping-stones, the fundamentals of good design remain the same: thoughtful planning, proper installation, and materials matched to your specific needs.
Selecting the Right Stone for Your Landscape
Choosing the right stone for your walkway might seem overwhelming at first, but it’s actually an exciting part of the stone walkway design journey. Here in New England, where we experience everything from summer heat waves to winter blizzards, picking the right material makes all the difference between a path that lasts for decades and one that needs constant repairs.
I remember working with a lovely couple in Burlington who had their hearts set on smooth limestone for their front entrance. After a friendly chat about our notorious wet falls and icy winters, they quickly understood why that might not be the best choice. Instead, we guided them toward a beautifully textured bluestone that not only provided much better traction but still achieved the neat look they wanted.
When helping our clients select stone, we always consider these essential factors:
Climate resilience is non-negotiable in Massachusetts. Your stones need to handle freezing temperatures, frequent rain and snow, and often salt exposure without cracking or deteriorating. Granite, bluestone, and certain types of sandstone have proven themselves time and again in our challenging environment.
Durability rating matters for long-term satisfaction. For walkways that will stand the test of time, we typically recommend materials with a Mohs hardness of at least 6. This ensures your investment will last through years of foot traffic and weather exposure.
Local availability just makes good sense. Stones sourced from New England quarries not only reduce transportation costs and environmental impact, but they also naturally complement our regional architecture. There’s something authentically New England about using stones that come from our own backyard.
Color palette should harmonize with your home’s character. Blues and grays tend to complement colonial homes beautifully, while warmer tans and browns feel right at home with craftsman or contemporary styles. Your walkway should feel like it’s always been part of your property, not an afterthought.
Texture and traction might not be the most exciting consideration, but it’s one your family will appreciate every rainy day. Smooth stones can become surprisingly slippery when wet or icy, which is why we often recommend stones with natural texture or those that can be finished with a non-slip surface.
For more information about how we can help you integrate your stone walkway into a comprehensive landscape design, visit our Landscape Design Services page.
Material Comparison & Cost Range
Let’s talk about what different materials offer and what you might expect to invest:
Flagstone runs approximately $12-$50 per square foot. These natural, irregular stones offer wonderful character and excellent durability. The wide price range reflects the variety available—with premium varieties like bluestone commanding higher prices for their distinctive color and quality.
Concrete pavers typically cost $8-$15 per square foot. Manufactured for consistency, they come in countless colors and patterns. Modern versions have become remarkably good at mimicking natural stone while offering a more budget-friendly alternative.
Brick pavers generally fall in the $10-$20 per square foot range. Their classic, timeless appearance offers excellent durability and a sense of tradition. While red is traditional, today’s options include various colors to match any design vision.
Natural slate usually costs $20-$30 per square foot. Its distinctive layered appearance creates unique coloration that many homeowners find irresistible. It does require careful installation to prevent flaking, but the results can be spectacular.
Note: These are average costs based on internet data and not actual costs for Boston Landscape Co. Actual pricing may vary significantly based on specific materials, site conditions, and design complexity, with high-end custom installations potentially costing 3x or more than average pricing.
Testing & Sourcing Tips
Before committing to a stone type, we recommend a few simple tests that can save headaches down the road:
The scratch test is remarkably revealing—simply scratch a sample with a key to test hardness. Stones that scratch easily might wear prematurely in high-traffic areas like your main entrance walkway.
A water absorption test takes just seconds. Place a few drops of water on the stone and observe how quickly they’re absorbed. Highly absorbent stones may be more vulnerable to staining and frost damage in our New England winters.
Creating a sample layout in your yard lets you see how different stones look in natural light against your home and existing landscape. What looks perfect in a showroom might feel completely different in your actual space.
When talking with suppliers, use our supplier checklist: Ask about stone origin, available quantities (to ensure matching if you need more later), and whether they can provide both corner pieces and flat pieces for a cohesive installation.
“I always encourage our clients in Stoneham and Woburn to visit stone yards with us,” as our design consultant often says. “There’s simply no substitute for seeing and touching the actual materials—it makes a tremendous difference in making the right selection.”
For those interested in learning more about how permeable paving can benefit both your property and the environment, check out this Scientific research on permeable paving.
Planning Your Path: Layout, Width & Drainage
Proper planning is the foundation of successful stone walkway design. Before the first stone is laid, careful consideration of layout, dimensions, and water management will save you from costly mistakes and ensure your walkway functions beautifully for years to come.
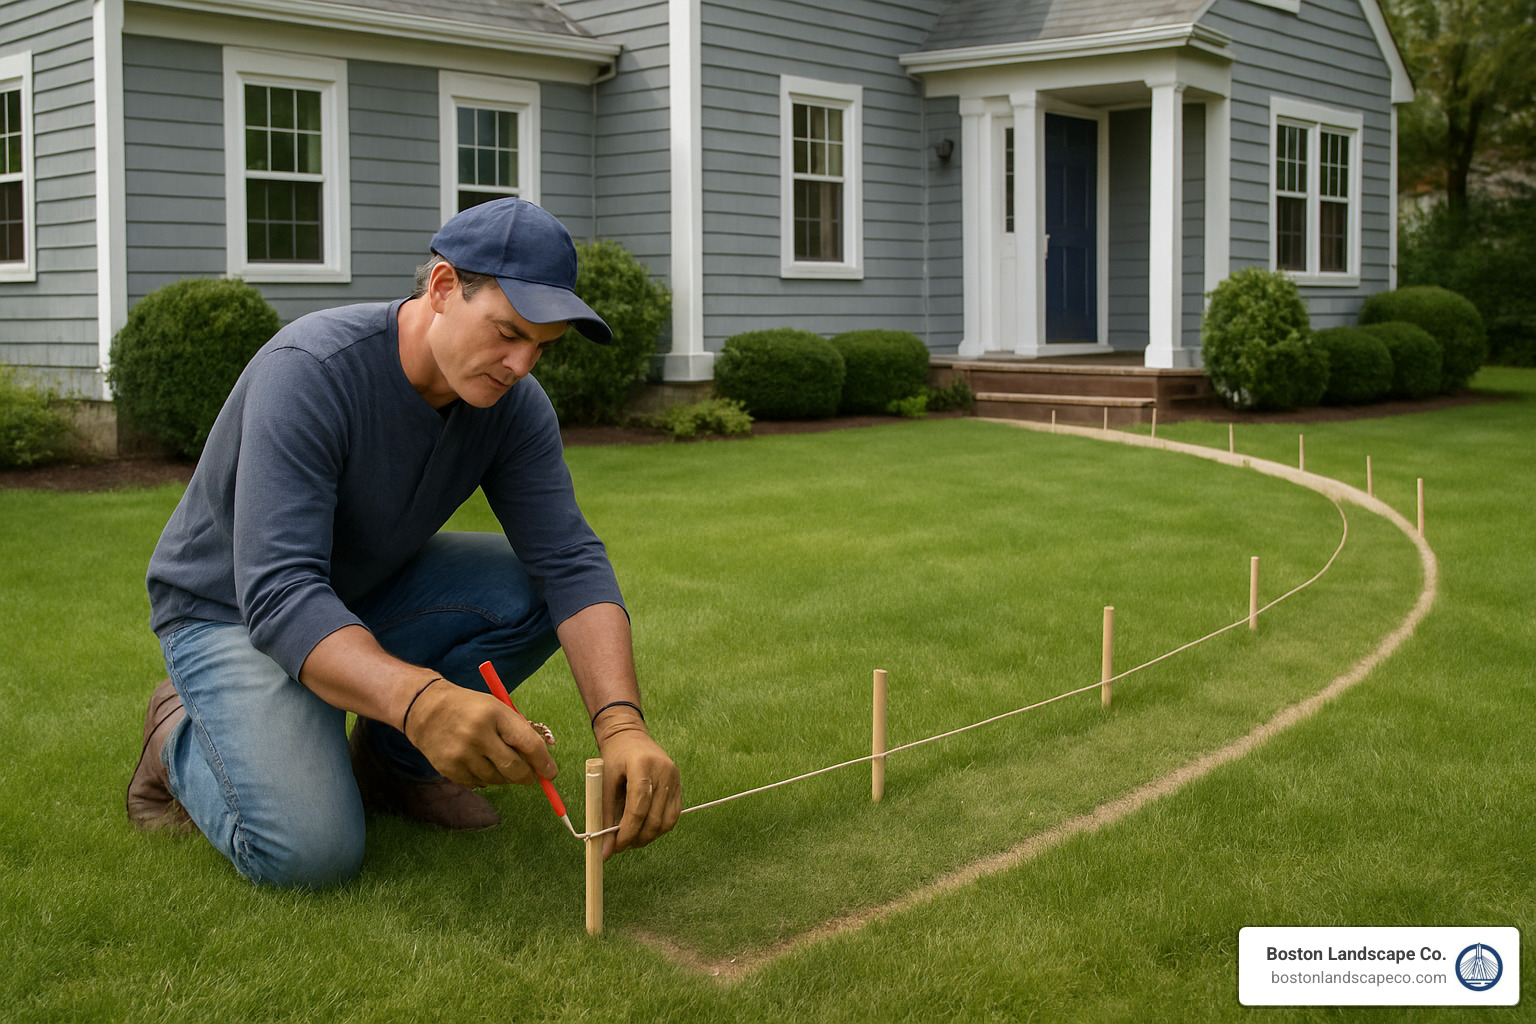
I love helping homeowners visualize their future paths. One of the simplest yet most effective planning techniques is to grab some stakes and string to outline straight sections, or lay a garden hose for those beautiful sweeping curves. This hands-on approach lets you actually walk your proposed route, feeling how it flows through your landscape before committing to any digging.
Width matters tremendously in creating a comfortable, usable path. For most homes in our Massachusetts communities, a 36-inch width works perfectly for standard residential walkways, giving enough room for comfortable single-file passage. Planning for two people to walk side-by-side? Bump that up to 48 inches. And if accessibility is important (which it often should be!), ADA guidelines suggest a minimum 36-inch width with 60-inch turnaround spaces at key points for wheelchair maneuverability.
“One of our Lexington clients initially wanted a narrow, winding path through their front garden,” shares our lead designer. “After walking the staked-out route, they realized the 24-inch width they’d envisioned would feel cramped when carrying groceries or walking with a child. We adjusted to 36 inches, which preserved the intimate feel while adding practicality.”
Don’t forget about the slope! Water is both friend and foe to stone walkways. A proper slope of 1/4 inch per foot directs rainwater and snowmelt away from your home’s foundation. This is especially important in areas like Medford and Winchester where clay soils can cause water to pool rather than drain naturally.
Before you get too excited about digging, please make that call to 811 to have underground utilities marked. This free service could save you from a dangerous (and expensive) encounter with gas, electric, or water lines. I’ve seen too many DIY projects go sideways when this simple step is skipped!
Mapping the Route
When plotting your walkway’s journey through your landscape, think like a storyteller. Where does your path begin and end? What experiences do you want along the way?
Connect logical points by creating direct routes between frequently visited destinations. The path from your driveway to your front door should feel intuitive and welcoming. Secondary paths might connect your patio to a garden gate or lead to a quiet reading nook under a favorite tree.
Use your walkway to highlight focal points in your landscape. I worked with a family in Arlington who slightly curved their front walkway to showcase a beautiful Japanese maple. That simple design choice transformed a utilitarian path into a daily moment of beauty for both residents and visitors.
Pay attention to desire lines – those worn paths that naturally form where people already walk across your yard. These intuitive routes tell you a lot about how space is actually used, not just how you think it should be used.
For properties with slopes, consider gentle switchbacks rather than direct up-and-down paths. This approach not only makes walking easier but also helps manage erosion by slowing water flow during heavy rains. This technique saved a Reading homeowner from constant mulch replacement after we redesigned their sloped side yard path.
Ensuring Proper Drainage & Stability
New England’s weather presents unique challenges for stone walkway design. Our freeze-thaw cycles can literally push stones up and out of place if your foundation isn’t right.
For a walkway that stands the test of time, start with a proper base of 4-6 inches of compacted 3/4-inch crushed stone or gravel. This foundation provides both stability and crucial drainage capacity. Think of it as your walkway’s insurance policy against shifting and settling.
Geotextile fabric might not be the most exciting material in your project, but it’s one of the most important. This unsung hero prevents soil from migrating up into your gravel base while still allowing water to pass through. Skip this step, and you might find your perfectly level walkway developing dips and valleys after just a few seasons.
Beyond the basic slope of your walkway, consider the overall water flow across your property. Sometimes a standard slope isn’t enough, and you’ll need additional solutions like a French drain alongside or underneath the walkway. This is particularly true in low-lying areas of Reading or Malden, where higher water tables and precipitation levels demand extra attention to drainage details.
“We installed a walkway in Waltham where the client had previously attempted a DIY installation that failed after the first winter,” notes our operations manager. “The stones had heaved dramatically because there was inadequate base preparation and no accommodation for drainage. Our solution included a proper gravel base and a subtle crown to the walkway that directed water to both sides, preserving both the aesthetics and functionality.”
The soil type in your yard matters too. Sandy soils drain well but might not provide stable support, while clay soils offer stability but poor drainage. Understanding your specific soil conditions helps determine whether you need additional drainage solutions to keep your walkway high and dry through our unpredictable New England seasons.
For more information about creating beautiful, functional outdoor spaces that work with our regional climate, check out our landscape design services.
Building Your Walkway: Step-by-Step Installation
There’s something deeply satisfying about watching a stone walkway design come to life, one carefully placed stone at a time. Having installed hundreds of walkways across Stoneham, Billerica, and surrounding communities, I’ve seen how the right installation techniques make all the difference in creating paths that last through decades of New England weather.
Let’s walk through the installation process together:
Start by excavating your pathway to a depth of 4-8 inches. If you’re working with the heavy clay soils common in Medford and Burlington, you’ll want to dig a bit deeper. This extra depth might seem excessive on day one, but you’ll thank yourself after the first freeze-thaw cycle!
Next, compact the subgrade soil thoroughly using a plate compactor. This step is crucial—skipping it is like building a house on a mattress instead of a foundation. The compacted soil provides a stable base that prevents future settling and those annoying dips that collect water.
“I remember a homeowner in Arlington who wanted to save time by skipping the compaction step,” shares our crew leader, Mark. “Six months later, we were back to fix the wavy pathway that had developed. Proper prep isn’t exciting, but it’s everything.”
Now it’s time for the base materials. Add crushed gravel in 2-inch layers, compacting each layer before adding the next, until you have a 4-6 inch base. This creates both stability and drainage—essential for Massachusetts winters. Then spread a 1-2 inch layer of coarse sand and level it using screed rails and a straight board.
With your base prepared, the fun begins—placing the stones according to your chosen pattern. For natural stone, approach this like a puzzle, maintaining consistent gaps of approximately ½ to 1 inch between pieces. Tap each stone with a rubber mallet to set it firmly, checking frequently with a level to ensure everything stays even.
Don’t forget edge restraints! These prevent the lateral creep that can ruin your walkway’s crisp lines over time. Options include plastic edging, metal strips, or a concrete haunch hidden beneath the soil line.
Once all stones are placed, sweep polymeric sand into the joints. This specialized sand hardens when wet while maintaining enough flexibility to prevent cracking during freeze-thaw cycles. It also discourages those persistent weeds that seem determined to find any available crack.
Finally, consider sealing your walkway. While optional, sealers can improve stone colors and provide protection from stains, especially for more porous materials like certain sandstones.
Tool & Material Checklist
Creating a professional-quality walkway requires the right tools for the job. You’ll need measuring and marking supplies (tape measure, marking paint, string line and stakes), excavation tools (shovels, picks, wheelbarrow), compaction equipment (hand tamper and plate compactor), leveling tools (2-foot and 4-foot levels), and finishing equipment (rubber mallet, masonry saw or angle grinder for cutting stone, broom, and garden hose).
Don’t forget safety gear! Gloves, eye protection, dust masks, and knee pads will save you from unnecessary pain and potential injuries.
For materials, you’ll need geotextile landscape fabric, crushed stone (¾-inch is ideal), coarse sand, edge restraints, your selected walkway stones, polymeric sand, and optional sealer.
If you’re tackling this as a DIY project, consider renting the plate compactor and masonry saw from places like Lowe’s rental department. One weekend’s rental is much more economical than purchasing equipment you’ll rarely use again.
Pro Tips for a Long-Lasting Build
After decades of installing walkways throughout Massachusetts, we’ve developed some insider techniques that make the difference between a good walkway and a great one:
Twist stones into place rather than simply dropping them onto the sand. This small motion creates better contact with the base and helps seat each stone firmly. Think of it like screwing in a light bulb—that quarter turn makes all the difference in creating solid contact.
Stagger your joints to distribute weight more effectively. Long continuous joints that run the length of your walkway create natural breaking points. Imagine how brick walls are built with each row offsetting the one below—the same principle applies to your walkway.
Don’t fear the saw when working with curves. Clean cuts create a more polished look than forcing irregular stones to fit, and they prevent those wide, debris-collecting gaps that become weed magnets by midsummer.
Plan for expansion in our New England climate by leaving slight gaps between stones that touch fixed structures like steps or walls. These invisible expansion joints accommodate seasonal movement without causing damage.
“One of my favorite projects was a flagstone walkway we installed in Winchester,” our installation manager recalls. “The homeowner was skeptical about how much base preparation we were doing, but after three winters without a single stone shifting, she told us it was the best investment she’d made in her property. That’s the reward of doing things right the first time.”
Taking the time to build your walkway properly means creating a path that will guide you through your landscape for decades to come, no matter what New England weather throws at it.
Costs, DIY vs Professional, and Ongoing Care
Let’s talk money—because whether you’re planning to roll up your sleeves or hire the pros, understanding the investment in your stone walkway design helps you plan realistically.
Having helped hundreds of homeowners across Stoneham, Billerica and surrounding towns create their dream pathways, I’ve seen how costs can vary dramatically based on materials, complexity, and who’s doing the heavy lifting.
For the ambitious DIYers among you, material costs typically run between $2.50-$3.50 per square foot using the sandset method. This includes your base materials, sand, and basic stones—but remember to factor in equipment rental costs (usually $150-$300 for a weekend) for that plate compactor you definitely don’t want to skip!
Professional installation, on the other hand, generally ranges from $12-$45 per square foot. Why such a wide range? Well, as one of our Waltham clients finded, there’s a world of difference between a simple straight bluestone path and a complex winding walkway with custom-cut granite and built-in lighting.
Note: These are average costs based on internet data and not actual costs for Boston Landscape Co. Actual pricing may vary significantly based on specific materials, site conditions, and design complexity, with high-end custom installations potentially costing 3x or more than average pricing.
Several factors can significantly impact your final bill:
Site access challenges can quickly add to labor costs—something our Winchester clients finded when their narrow side yard meant all materials had to be wheelbarrowed in rather than dropped close to the installation site.
Excavation requirements vary tremendously based on soil quality. Clay-heavy soils common in parts of Medford often need deeper bases, while pattern complexity like herringbone or intricate inlays requires more cutting, fitting, and installation time.
“We worked with a family in Carlisle who wanted a bluestone walkway but were concerned about cost,” shares our project consultant. “By adjusting the pattern from a complex herringbone to a simpler running bond and using a mix of bluestone sizes that reduced cutting waste, we were able to create a beautiful walkway that fit their budget while maintaining the neat look they desired.”
DIY or Hire Out?
The age-old question! After guiding countless homeowners through this decision, I’ve found it really comes down to four factors: complexity, experience, equipment, and time.
DIY makes sense when your project is relatively straightforward—perhaps a simple garden path with gentle curves. You’ll need some basic hardscaping experience (or at least strong YouTube research skills!), access to proper equipment, and patient helpers who don’t mind some heavy lifting. The satisfaction of building something with your own hands is undeniable, and the cost savings can be substantial.
Professional installation shines when dealing with complex designs, elevation changes, drainage challenges, or premium materials. Our Lexington clients often tell us they initially considered DIY but opted for professional installation after realizing the complexity of proper base preparation for New England’s freeze-thaw cycles.
“Many of our clients in Concord and Lexington start with the intention of DIY installation but call us after realizing the complexity involved,” notes our customer service manager. “We’re always happy to provide consultation even if you’re planning to do the work yourself, as proper planning can save significant headaches down the road.”
The warranty factor shouldn’t be overlooked either—knowing your investment is protected brings tremendous peace of mind, especially with higher-end installations.
Maintenance & Troubleshooting
One of the joys of a well-built stone walkway design is its relatively low maintenance needs. That said, a little seasonal attention keeps your path looking its best for decades.
Think of spring as inspection season—this is when winter damage reveals itself. Look for cracked stones or areas where joint sand has washed away. A quick top-up of polymeric sand and replacement of any damaged stones keeps small issues from becoming big problems.
Summer calls for occasional weed patrol and perhaps a gentle cleaning. I always remind our Woburn clients that a garden hose and soft brush are usually sufficient—save the pressure washer for extreme situations as it can damage joint material.
Fall maintenance is all about preventing problems—clear those beautiful autumn leaves regularly to prevent staining and slippery conditions.
Winter requires special care with ice management. Calcium chloride ice melt products are your friend, while traditional rock salt can damage certain stones and surrounding plant life. Our Burlington clients who switched from rock salt to calcium chloride noticed significantly less edge deterioration the following spring.
“A client in Winchester called us concerned about some settling in their two-year-old walkway,” recalls our service manager. “Instead of a costly rebuild, we were able to lift just the affected stones, add additional base material, and reset them—a simple fix that restored both safety and aesthetics.”
For those dealing with moss growth, a simple solution of 1 part bleach to 10 parts water usually does the trick without harming stones—though some of our Stoneham clients actually prefer the aged, mossy character it adds to garden paths.
Addressing small issues promptly prevents them from becoming major undertakings. That slightly wobbly stone? Fix it now before it becomes a tripping hazard or allows water to undermine your base materials.
Looking for professional help with your hardscape installation? Learn more about our Hardscape Installation Company services that can transform your outdoor space.
Finishing Touches & Trending Ideas
The details that accompany your stone walkway design can lift it from merely functional to truly extraordinary. At Boston Landscape Co., we’ve seen how thoughtful finishing touches transform a simple path into a landscape highlight.
Current trends in stone walkway design include:
- Mixed materials: Combining stone types or integrating wood, metal, or concrete elements creates visual interest and can help define different zones in your landscape.
- Permeable designs: Increasingly popular in environmentally conscious communities like Somerville and Cambridge, these designs feature wider gaps between stones filled with small gravel or hardy ground covers that allow water to percolate into the soil.
- Integrated technology: From subtle path lighting to app-controlled LED systems that change color with the seasons, technology is finding its way into modern walkway designs.
- Eco-friendly approaches: Using locally sourced stone, recycled materials for base layers, and native plants along borders reduces environmental impact.
One of our favorite techniques is the classic brick soldier course edging, where bricks are placed vertically along the walkway edge to create a defined border. This technique works beautifully in historical neighborhoods like Lexington and Concord, complementing traditional architecture.
“We installed a cobblestone lattice walkway with gravel infill for a client in Wellesley,” shares our design director. “The pattern allows rainwater to drain naturally while creating a distinctive texture that complements their cottage garden. The clients love how it looks both established and contemporary at the same time.”
Planting Along the Path
The right plants can transform a stone walkway from a simple transit route into an immersive garden experience:
- Between stones: Low-growing, foot-tolerant plants like creeping thyme, Irish moss, or sedum can be planted in wider joints between stones, softening the hardscape and adding seasonal interest.
- Border plantings: Consider the height progression of plants along your walkway—low groundcovers at the edge, medium perennials behind, and perhaps taller structural plants at key points.
- Seasonal interest: Plan for year-round appeal by including early spring bulbs, summer perennials, fall color, and winter structure in your walkway plantings.
- Pollinator support: In Lexington and Concord, we’ve seen increasing interest in walkway borders designed specifically to support native pollinators, combining beauty with ecological function.
“A client in Medford wanted their front walkway to become a sensory experience,” recalls our landscape designer. “We planted lavender and thyme along the edges so that brushing against them releases fragrance, added ornamental grasses for sound and movement, and included tactile plants like lamb’s ear at key points. It’s now their favorite feature of their entire landscape.”
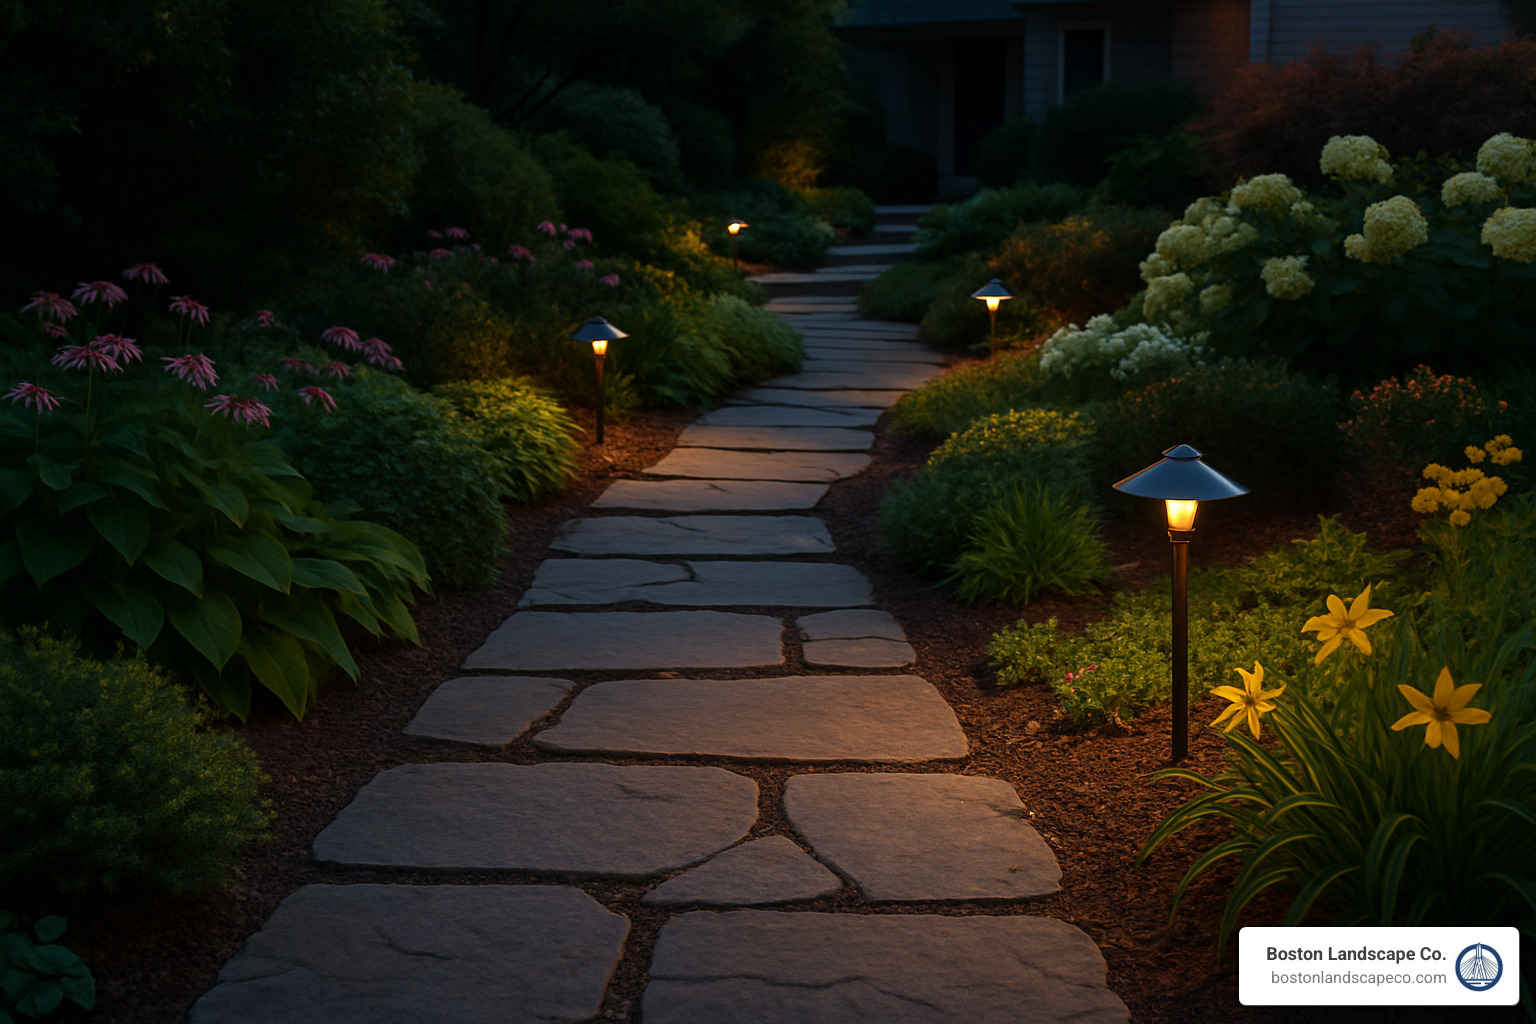
Lighting & Smart Features
Proper lighting transforms your stone walkway after dark, extending its usability while enhancing safety and ambiance:
- Low-voltage systems: Energy-efficient and easy to install, these systems can be expanded over time as your landscape evolves.
- Solar options: While not as reliable in New England winters, modern solar lights provide maintenance-free illumination during spring through fall.
- Recessed lights: For a sleek, contemporary look, consider lights recessed into the walkway itself or in adjacent walls.
- Smart controls: New systems allow programming based on time, motion detection, or even weather conditions, ensuring your walkway is perfectly lit exactly when needed.
In Burlington, we recently completed a walkway featuring subtle LED strip lighting beneath the capstones of a low border wall. The effect creates a floating appearance at night while providing sufficient illumination for safe passage—a perfect blend of form and function.
Frequently Asked Questions about Stone Walkway Design
How wide should my stone walkway be?
I get this question all the time when meeting with homeowners in Winchester and Lexington. The perfect width really depends on how your walkway will be used and where it’s located in your landscape.
For your main walkways—those connecting major points like your driveway to your front door—I typically recommend at least 48 inches wide. This comfortable width allows two people to walk side by side, whether you’re chatting with a neighbor or carrying groceries alongside your child.
Secondary garden paths where people typically walk single-file can be narrower at 36 inches. This width still feels generous for a garden stroll while preserving more planting space.
“We had a client in Reading who initially wanted a very wide 6-foot front walkway,” I recall sharing with another customer recently. “After discussing traffic patterns and visual proportions, we settled on a 4-foot width that better complemented their home’s scale while still providing comfortable passage.”
For wheelchair accessibility (something more homeowners are wisely considering these days), maintain at least 36 inches of clear path with 60-inch turnaround spaces at key points like entrances or where the path changes direction.
What base depth prevents shifting in New England winters?
If there’s one thing I’ve learned in my years installing stone walkway designs around Boston, it’s that our New England freeze-thaw cycles are merciless on hardscaping. That beautiful walkway can quickly become a wobbly, uneven mess without proper preparation.
For walkways that will truly stand the test of time in our climate, you’ll need:
- A minimum of 6 inches of compacted crushed stone base for typical applications
- In areas with clay soils or poor drainage (common in parts of Malden), increasing to 8-10 inches
- Proper drainage solutions including geotextile fabric and slight crowning of the walkway
- In severe freeze areas, consider adding rigid foam insulation beneath the base
“After the brutal winter of 2015, many improperly installed walkways in Malden and Medford suffered significant heaving,” I often tell new clients. “The walkways we installed with proper base preparation came through unscathed, demonstrating that initial investment in proper technique pays dividends in longevity.”
The extra few inches of base material might seem unnecessary when you’re budgeting your project, but it’s truly the difference between a walkway that lasts decades and one that needs rebuilding after just a few years.
Can I lay stones directly on soil if I’m in a hurry?
I understand the temptation—you’ve got weekend guests coming, the weather’s finally nice, and those beautiful flagstones are sitting in your driveway. Why not just lay them directly on the soil and be done with it?
While technically possible, I strongly advise against this shortcut for several reasons:
Without proper base preparation, stones will settle unevenly over time, creating dangerous trip hazards right where you and your family walk daily. In our New England climate, freeze-thaw cycles will cause significant movement and potential heaving that makes the problem worse each year. Weeds will grow aggressively between and around the stones, requiring constant maintenance. And most importantly, that “quick” walkway will likely need to be completely rebuilt within 1-2 years.
Even for temporary solutions, I recommend at least excavating the area, compacting the soil, and adding 2 inches of sand beneath the stones. This minimal preparation will significantly improve stability and longevity.
“A client in Stoneham once showed me a Pinterest-inspired stepping stone path they’d installed directly on soil the previous year,” I remember telling a homeowner considering the same approach. “By the time we saw it, several stones had sunk completely below grade while others were protruding dangerously. The minimal savings in time and materials had resulted in a path that was both unsafe and unattractive.”
The right preparation makes all the difference between a walkway that improves your property for decades and one that becomes a constant source of frustration. When you’re ready to do it right, our hardscaping expertise ensures your walkway will stand the test of time.
Conclusion
Creating the perfect stone walkway design is where art meets science. After helping hundreds of homeowners transform their outdoor spaces, we at Boston Landscape Co. have seen how a well-designed stone path becomes so much more than just a way to get from here to there.
When I walk clients through their completed projects in Medford or Winchester, there’s often a moment of quiet appreciation—that instant when they realize their new walkway doesn’t just connect their driveway to their front door, it lifts their entire property.
“I never thought a stone path could make such a difference,” a Lexington homeowner told me last fall. “Now instead of hurrying to the door, my family actually enjoys the journey through our garden. It’s changed how we experience our home every day.”
That’s the real magic of thoughtful stone walkway design—it transforms necessary transitions into meaningful moments. Whether it’s the satisfying crunch of gravel underfoot, the timeless elegance of bluestone, or the old-world charm of cobblestone, your walkway sets the tone for your entire landscape.
The best part? Unlike many landscape elements that require constant attention, a properly installed stone walkway actually improves with age. As nearby plants mature and seasonal changes bring different colors and textures, your walkway provides the perfect framework for nature’s ongoing display.
Successful walkways start with proper planning and quality materials. The extra time spent on base preparation and drainage solutions pays enormous dividends through decades of trouble-free enjoyment, especially in our challenging New England climate where frost heave can quickly destroy shortcuts.
For DIY enthusiasts, we’ve shared our professional techniques and material recommendations to help you create a walkway you’ll be proud of. And for those who prefer to leave it to the experts, our experienced team brings decades of hardscaping knowledge to every project across the greater Boston area.
Your perfect outdoor path awaits—one that reflects your personal style, complements your home architecture, and improves your connection to the outdoors. Whether you’re dreaming of a formal entrance walkway, a meandering garden path, or a functional connection between outdoor living spaces, the right stone walkway becomes both a journey and a destination.
Ready to transform your landscape with a custom stone walkway? We invite you to contact Boston Landscape Co. for a consultation. Our team of hardscape specialists serves communities throughout the greater Boston area, bringing expertise, creativity, and craftsmanship to every project.
