Driveway Paver Installation: Top Guide for 2025 Success
Driveway paver installation can transform your property’s curb appeal and functionality. If you’re considering this home improvement, here’s what you need to know:
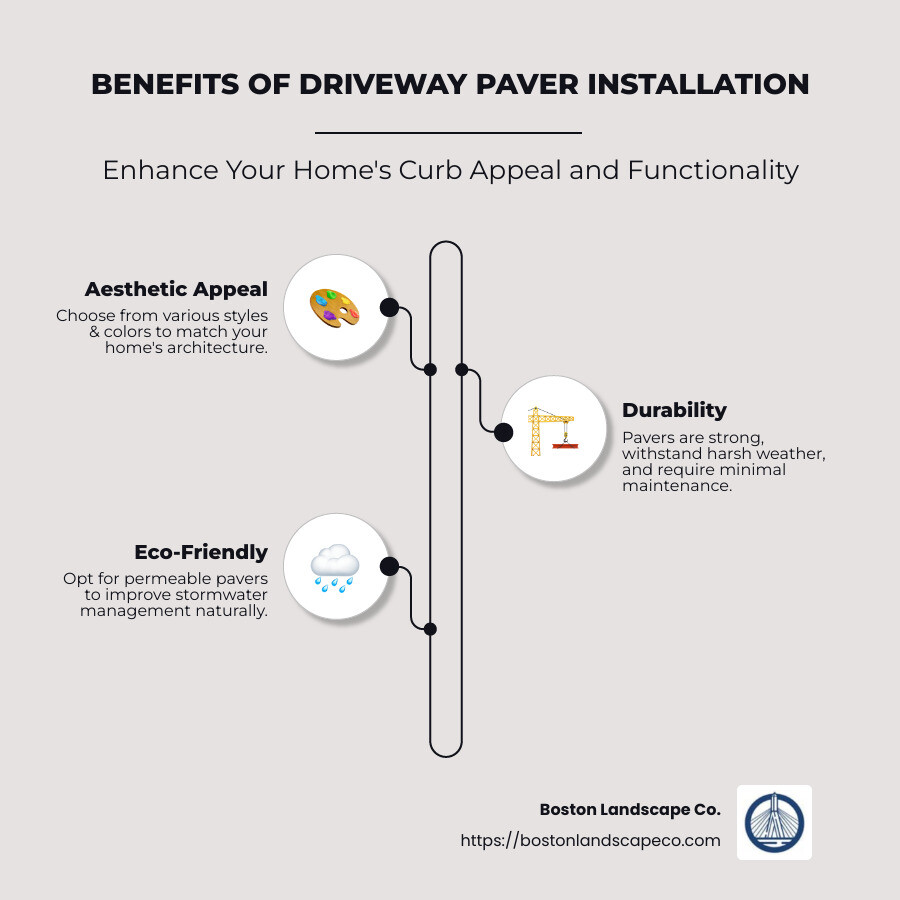
- Aesthetic Appeal: Pavers come in various styles and colors, customizable to suit any home’s architecture.
- Durability: Unlike concrete or asphalt, pavers are strong, withstand harsh weather, and require minimal maintenance.
- Eco-Friendly: Choose permeable pavers for better stormwater management, allowing water to naturally filtrate into the soil.
I’m Steve Schumacher, owner of Boston Landscape Co., with over 30 years of experience in landscape design and installation. I’ve helped countless Boston-area residents achieve stunning results through driveway paver installation guiding them from concept to completion with expertise.
Driveway paver installation further reading:
– hardscapes near me
– hardscaping services near me
– landscape contractor
Planning Your Driveway Paver Installation
Planning is key for a successful driveway paver installation. Let’s break down the steps to make sure your project goes smoothly.
Assess Soil Conditions
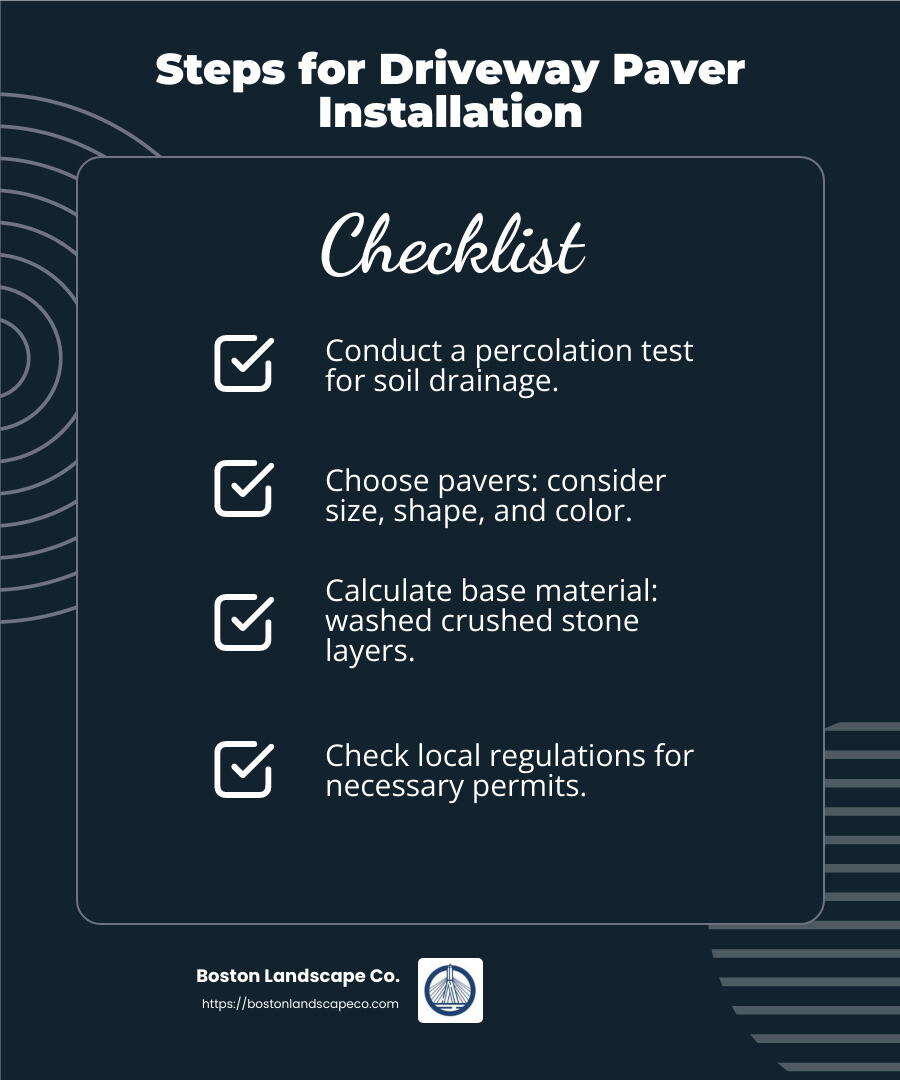
Before you start, it’s important to understand the soil conditions. Conducting a percolation test helps you determine how well the soil absorbs water. If the soil doesn’t drain well, you might need to improve drainage to prevent water pooling.
For instance, in areas like Boston, where clay soils are common, you might need to dig deeper or add drainage systems to ensure your driveway lasts. Proper drainage is crucial for maintaining the integrity of your driveway over time.
Calculate Materials Needed
Choosing the right materials is essential. First, decide on the type of pavers you want. They come in various sizes, shapes, and colors, allowing you to customize the look of your driveway.
Next, calculate the base materials. A typical base includes layers of washed crushed stone:
- Bottom Layer: 3/4- to 2-inch crushed stone for stability.
- Middle Layer: 1/4- to 1-1/2-inch crushed stone for additional support.
- Bedding Layer: 1/4-inch stone to create a smooth surface for the pavers.
Obtain Necessary Permits
Check your local regulations to ensure compliance with construction permits. In places like Waltham or Lexington, specific permits might be required for driveway installations. Contact your local city or town offices to find out what permits you’ll need.
Having the right permits not only keeps your project legal but also ensures that your installation meets local building codes and safety standards.
By carefully planning your driveway paver installation, you set the stage for a durable and beautiful driveway that improves your property’s value and appeal. Up next, we’ll guide you through the step-by-step process of installing your driveway pavers.
Step-by-Step Guide to Driveway Paver Installation
Mark and Excavate the Site
Before breaking ground on your driveway paver installation, it’s crucial to mark the site and identify any underground utilities. Contact your local utility company to mark these areas, ensuring a safe excavation. Once marked, use stakes or marking paint to outline the driveway area.
Excavation depth is key. Depending on your soil conditions and climate, you’ll typically dig 7-9 inches deep. This depth accommodates the base layers and pavers, ensuring a stable foundation.
Laying the Base Layers
The base is the backbone of your driveway, providing stability and drainage. Start with a layer of crushed stone. The bottom layer should consist of 3/4- to 2-inch crushed stone, compacted firmly to create a stable ground. Use a mechanical compactor to go over the area multiple times.
Next, apply a middle layer of 1/4- to 1-1/2-inch crushed stone. Again, compact thoroughly to prevent future settling. This layer adds additional support, crucial for areas with heavy rainfall or clay soils.
Screed the Bedding Layer
Once your base layers are compacted, it’s time to screed the bedding layer. Spread a 1-inch layer of coarse sand or 1/4-inch stone across the base. Use screed pipes and a straight edge to level the sand, ensuring a smooth surface for the pavers. Avoid walking on the sand after leveling to maintain its evenness.
Install edging along the perimeter to keep the sand and pavers in place. Edging can be plastic, metal, or cement, depending on your preference and budget.
Place the Pavers
Now comes the fun part—placing the pavers! Start from one corner, laying each paver snugly against the next. Use a rubber mallet to tap them into place, ensuring they are level. For curves or patterns, you may need to cut pavers to fit. A masonry saw or guillotine-style splitter works well for clean cuts.
Selecting a pattern adds character to your driveway. Whether you choose herringbone, basket weave, or a simple linear pattern, ensure consistency and alignment for a professional look.
Fill the Joints and Tamp
After placing all the pavers, fill the joints with joint material, like fine sand. Use a broom to sweep the sand into the joints, filling them completely. This sand locks the pavers in place, preventing movement.
Finally, use a plate compactor to tamp down the pavers. Cover the compactor with a protective layer, like a heavy gunnysack, to avoid scuffing the pavers. Make multiple passes to ensure the pavers are securely set.
By following these steps, you’ll achieve a durable and visually appealing driveway that improves your home’s curb appeal. Next, we’ll explore the benefits of permeable paver driveways and how they contribute to stormwater management and environmental sustainability.
Benefits of Permeable Paver Driveways
Choosing permeable paver driveways is not just about aesthetics. It’s about making a positive impact on the environment while enjoying practical benefits.
Stormwater Management
One of the standout features of permeable paver driveways is their ability to manage stormwater effectively. Unlike traditional materials, these pavers allow water to seep through the gaps and into the ground. This reduces water runoff, which can carry oil and chemicals into the streets and overload storm drains.
In fact, a well-installed permeable driveway can absorb at least 10 inches of rain per hour. That’s about twice the intensity of the heaviest 100-year downpour in the U.S. This makes them an excellent choice for areas prone to heavy rainfall or flooding.
Environmental Impact
Permeable paver driveways are an eco-friendly alternative to asphalt or concrete. By allowing water to filter through, they help remove pollutants before the water reaches rivers and streams. This process replenishes groundwater supplies and reduces the burden on municipal storm sewer systems.
Moreover, these driveways can help prevent erosion and flooding, contributing to a healthier ecosystem. Choosing materials like brick or natural stone further improves their environmental benefits, as these materials often have a lower carbon footprint than traditional paving options.
Maintenance
While permeable paver driveways require regular maintenance, it’s straightforward and less intensive than you might think. Plan to sweep or vacuum the joints at least once a year to prevent them from becoming clogged with leaves and debris. This simple step keeps your driveway functioning effectively and looking great.
In addition, permeable pavers typically discourage weed growth, but some may still appear. Regularly removing weeds by hand or using an environmentally friendly herbicide can help keep your driveway pristine.
Choosing permeable pavers means investing in a driveway that not only improves your property’s curb appeal but also supports sustainable practices. Up next, we’ll dive into the cost considerations for driveway paver installation, helping you plan your budget effectively.
Cost Considerations for Driveway Paver Installation
When planning your driveway paver installation, understanding the costs involved is crucial. Here’s a breakdown of what to expect in terms of material and labor costs, as well as potential long-term savings.
Material Costs
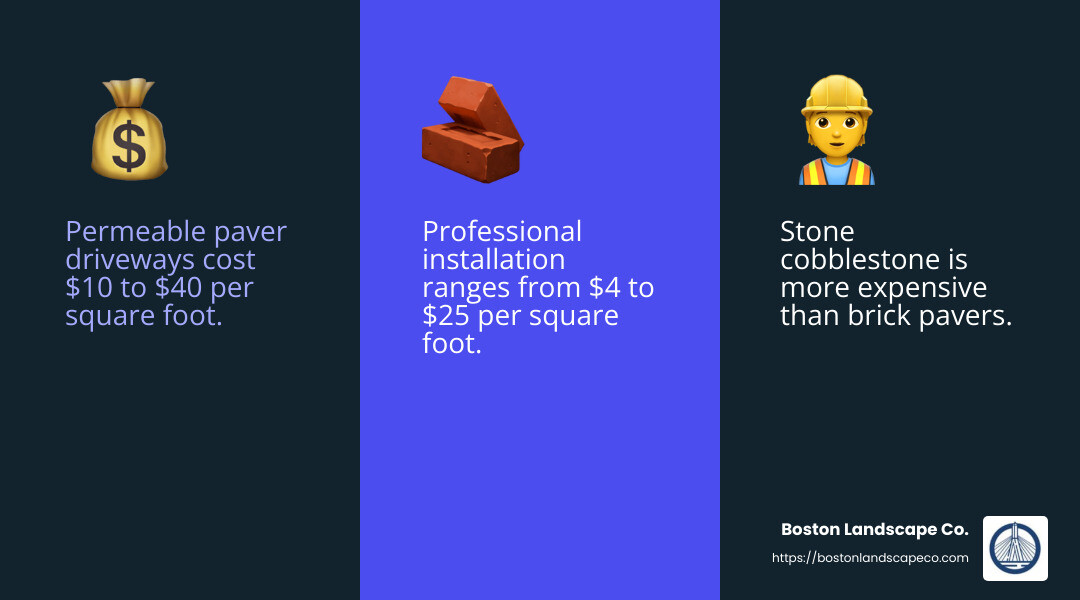
The type of pavers you choose will significantly impact your budget. Options range from basic concrete pavers to high-end stone varieties like cobblestone. On average, permeable paver driveways cost between $10 and $40 per square foot. This translates to a total cost of $4,800 to $19,200 for a typical driveway.
Factors influencing material costs include:
- Paver Type: Stone cobblestone is more expensive than brick or grass options.
- Quality: Higher-quality materials may have a steeper upfront cost but often offer better durability and aesthetics.
Labor Costs
Labor costs can vary based on your location and the complexity of the installation. In areas like Boston and its surrounding cities, the demand for skilled installers can affect prices. Professional installation typically ranges from $4 to $25 per square foot, which includes site preparation, paver placement, and finishing touches.
Hiring professionals ensures that the job is done correctly, minimizing the risk of issues like improper drainage or uneven surfaces. While DIY installation might save on labor costs, it requires significant skill and time, and mistakes can lead to costly repairs.
Long-Term Savings
While the initial investment in paver driveways can be higher than traditional asphalt or concrete, the long-term benefits are noteworthy:
- Durability: Pavers are less prone to cracking and can be replaced individually if damaged, reducing repair costs.
- Maintenance: Lower maintenance requirements compared to traditional driveways, with less need for resurfacing or sealing.
- Property Value: Paver driveways can increase property value due to their aesthetic appeal and durability.
Investing in permeable pavers can also lead to potential savings on stormwater fees in some municipalities, as they help manage water runoff effectively. Over time, these benefits can offset the higher upfront costs, making paver driveways a smart financial choice.
Next, we’ll address frequently asked questions about driveway paver installation, including cost comparisons and base preparation techniques.
Frequently Asked Questions about Driveway Paver Installation
How much does it cost to install a paver driveway?
The cost of installing a paver driveway varies widely based on several factors. On average, you can expect to pay between $10 and $40 per square foot. This means a typical driveway could cost anywhere from $4,800 to $19,200.
Key factors affecting cost:
- Size of the Driveway: Larger driveways require more materials and labor, increasing the overall cost.
- Type of Pavers: High-end materials like cobblestone are more expensive than basic concrete or brick.
- Complexity of the Design: Intricate patterns or designs can add to labor costs.
- Site Preparation Needs: If the site requires significant grading or drainage work, costs can rise.
Is a paver driveway cheaper than concrete?
Initially, pouring concrete might appear cheaper than installing pavers due to lower material and labor costs. However, paver driveways can offer better long-term value.
Cost Comparison:
- Initial Cost: Concrete is generally less expensive upfront.
- Long-Term Benefits: Pavers are more durable and less prone to cracking. If a paver gets damaged, it can be replaced individually, saving on repair costs. This is not the case with concrete, which may require complete resurfacing if damaged.
- Aesthetic Appeal: Pavers often improve property value more than concrete due to their visual appeal.
How do you prepare a base for driveway pavers?
A solid base is crucial for the longevity and stability of a paver driveway. Proper preparation involves several layers and compaction techniques to ensure the driveway withstands the test of time.
Base Layers:
- Sub-base Layer: This is typically 4 to 6 inches of crushed stone or gravel. It provides a sturdy foundation and aids in drainage.
- Base Layer: A finer gravel or coarse sand layer, about 1 to 2 inches thick, is added for a smooth surface.
- Bedding Layer: This final layer is usually 1 inch of fine sand, which helps in adjusting the height and position of the pavers.
Compaction Techniques:
- Use a plate compactor to compact each layer thoroughly. This prevents future settling and maintains a level surface.
- Compact in layers: Each layer should be compacted before adding the next to ensure maximum stability.
Proper base preparation is essential to prevent issues like uneven surfaces or poor drainage, which can lead to costly repairs down the line.
Conclusion
Choosing Boston Landscape Co. for your driveway paver installation is a smart investment in both aesthetics and functionality. Our team in Massachusetts is dedicated to providing professional installation services that meet your unique needs. With our expertise, your driveway will not only look stunning but also stand the test of time.
One of the standout features of our services is our commitment to eco-friendly solutions. By opting for permeable paver driveways, you contribute to better stormwater management and environmental protection. These pavers allow water to seep through, reducing runoff and helping to recharge groundwater supplies. This is crucial in areas prone to heavy rainfall, like Massachusetts.
Moreover, our comprehensive approach ensures every aspect of your project is handled with care. From site assessment and obtaining necessary permits to precise installation and finishing touches, we cover it all. This means you can relax, knowing your driveway is in capable hands.
Investing in a driveway with Boston Landscape Co. means enhancing your home’s curb appeal while making a positive environmental impact. Visit our hardscaping service page to learn more about how we can transform your outdoor space. Let us help you create a driveway that not only welcomes you home but also reflects your commitment to quality and sustainability.
